A ceiling leak at 2 a.m. creates immediate stress for any homeowner. The good news: most leaks are caused by minor issues you can find and fix yourself before calling a professional.
This guide walks you through finding the source of a leak, making common repairs, knowing when to call a professional, and getting fair quotes when you do.
Many homeowners worry about being pressured into unnecessary repairs or paying inflated prices. Understanding these basics helps you have informed conversations with contractors and recognize fair pricing.
How to find a roof leak in your home
Fixing a leaking roof starts with finding where water is actually getting in. The tricky part? Water travels. A drip showing up in your living room ceiling might come from a spot ten feet away on your roof. So before grabbing any sealant or calling a contractor, you want to trace the leak back to its source.
The most reliable approach combines an attic inspection with a water test. First, look for signs of water damage from inside. Then, if the source is still unclear, use a garden hose to simulate rain and pinpoint the entry point.
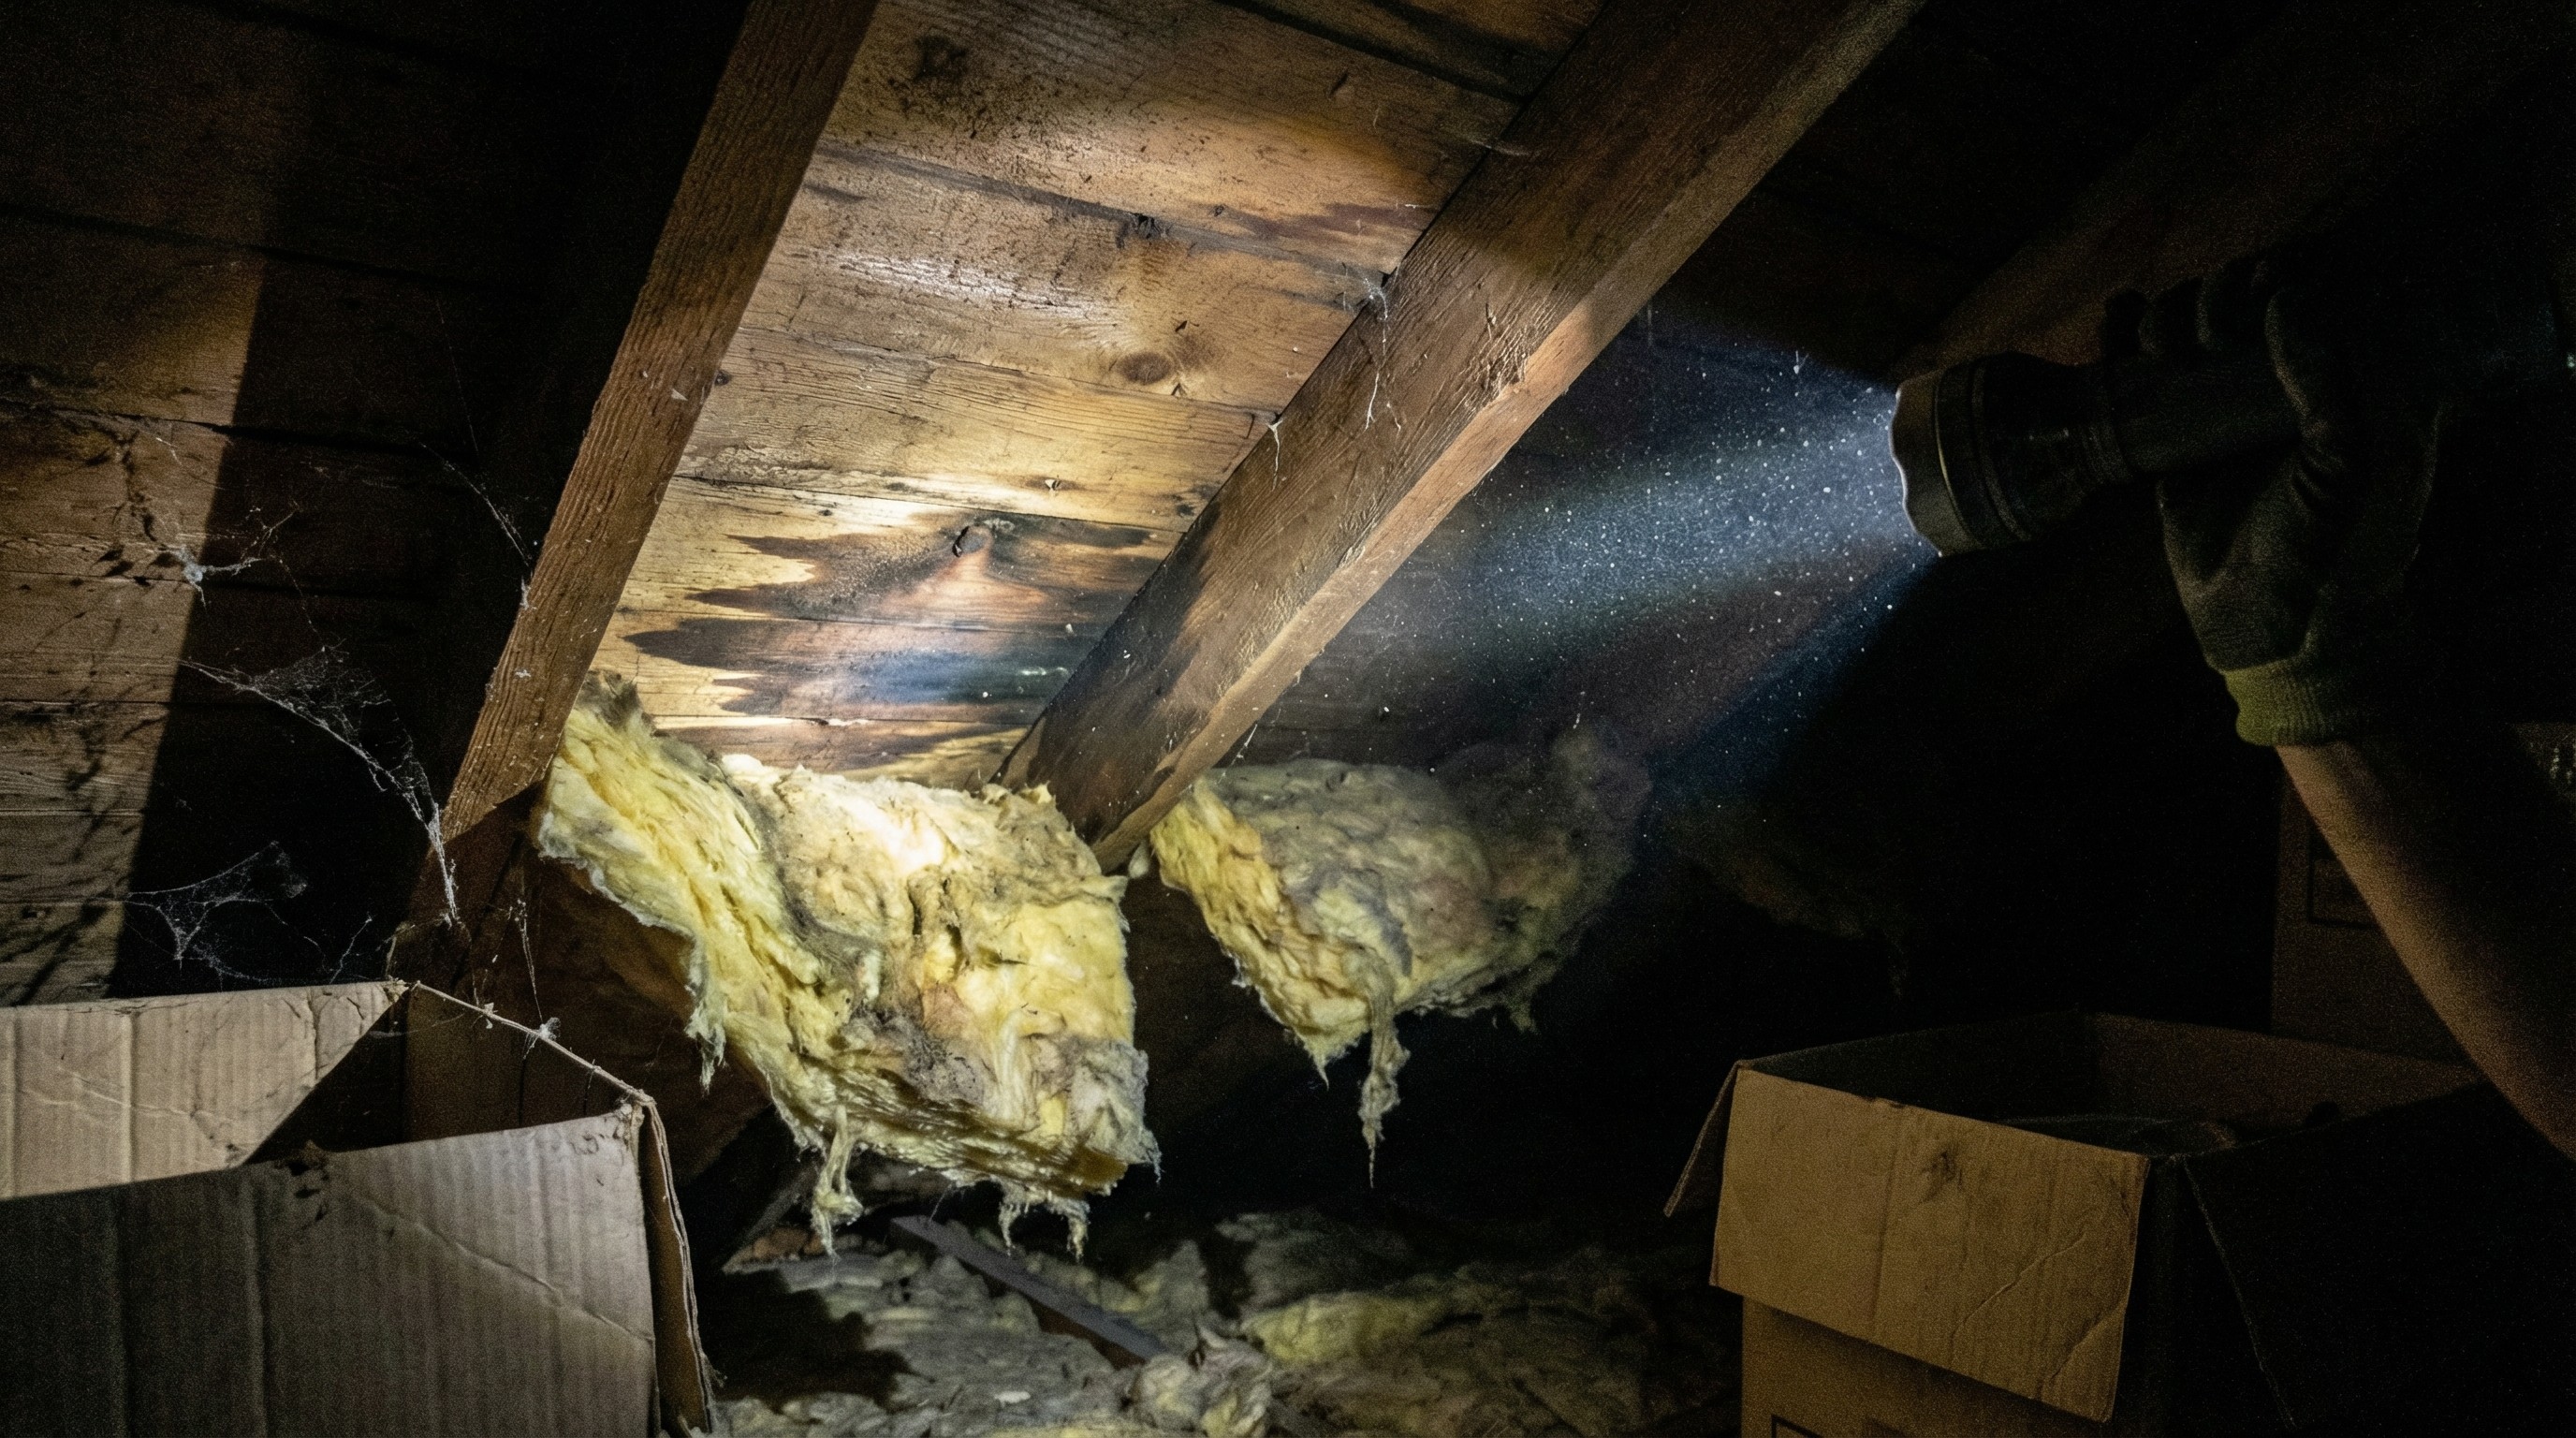
Check your attic for water stains and wet insulation
Grab a flashlight and head up to your attic. You are looking for dark stains on the wood, damp or matted insulation, or any spots where daylight peeks through the roof boards.
Understanding water behavior is key: it runs along rafters and beams before dripping down.
Look for ceiling and wall damage inside
Inside your living space, watch for bubbling paint, sagging drywall, or brown water rings on ceilings. A musty smell or visible mold means water has been present for a while.
Keep in mind that interior damage shows where water is pooling, not necessarily where it entered. The actual roof leak could be anywhere uphill from the stain.
Inspect your roof from the outside
Before climbing up, do a ground-level visual check. Using binoculars from the ground allows you to spot damage safely without climbing up. Look for missing or curled shingles, debris buildup in valleys, and visible damage around chimneys, vents, or skylights.
Pay close attention to areas where different roof sections meet. Transition points are common leak sources because they rely on flashing and sealant to stay watertight.
Use the water test to confirm the leak source
If you still cannot pinpoint the leak, try a water test. Have someone wait in the attic while you spray sections of the roof with a garden hose.
Work from the bottom of the roof upward, soaking each area for several minutes before moving higher. When your helper sees dripping start, you have found your leak location. This method takes patience but works well for stubborn leaks.
Common causes of roof leaks
Most roof leaks come from a handful of predictable spots. Knowing what to look for helps you identify your specific problem faster.
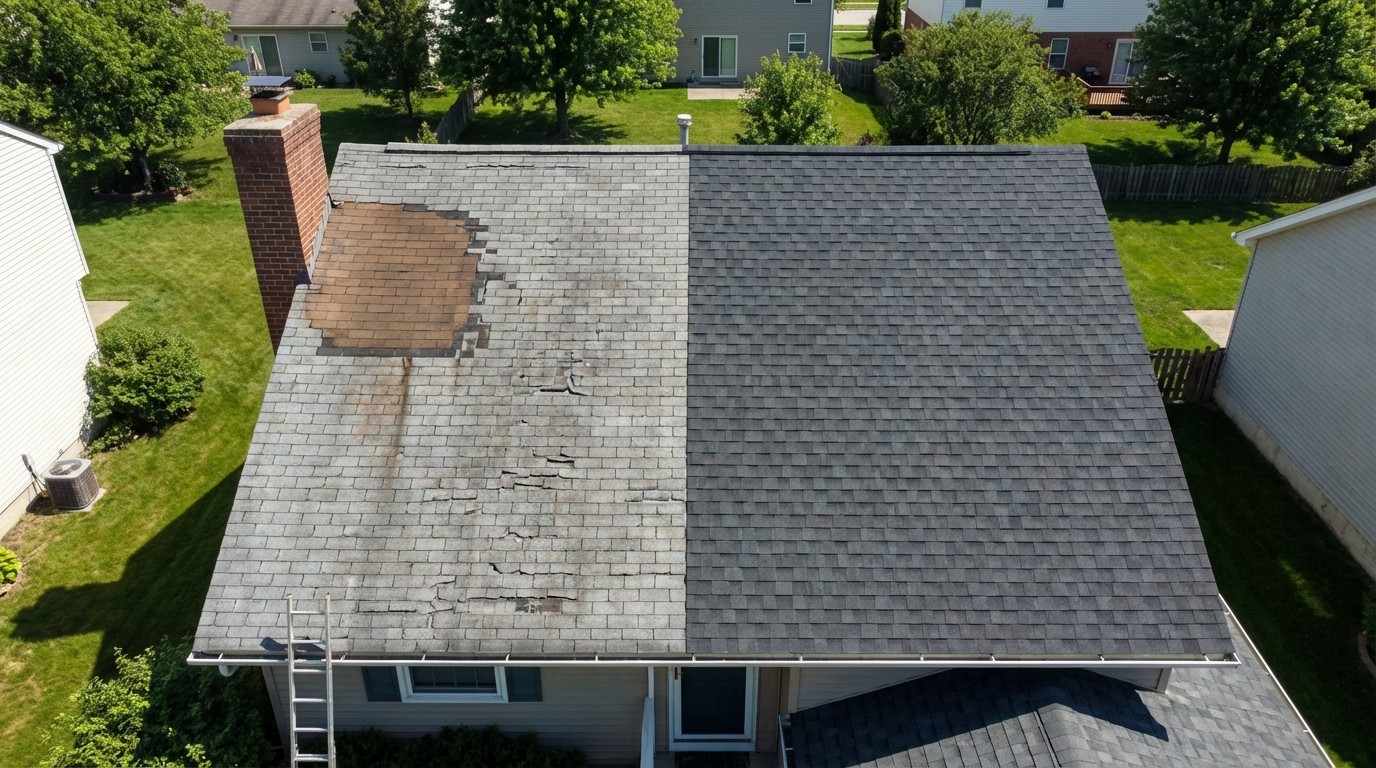
Damaged or missing shingles
Shingles crack, curl, or blow off during storms. When a shingle fails, the underlayment beneath becomes exposed to rain and UV damage. Left alone, water finds its way through.
Shingle damage causes about 40% of roof leaks and typically takes 15-30 minutes to fix yourself with basic tools.
Cracked or corroded flashing
Flashing is the thin metal strips that seal joints and transitions on your roof. You will find flashing around chimneys, vents, skylights, and where the roof meets walls.
Over time, flashing rusts, lifts at the edges, or pulls away from surfaces. Even small gaps let water in. If you see rust streaks or lifted edges during your inspection, flashing is likely your culprit.
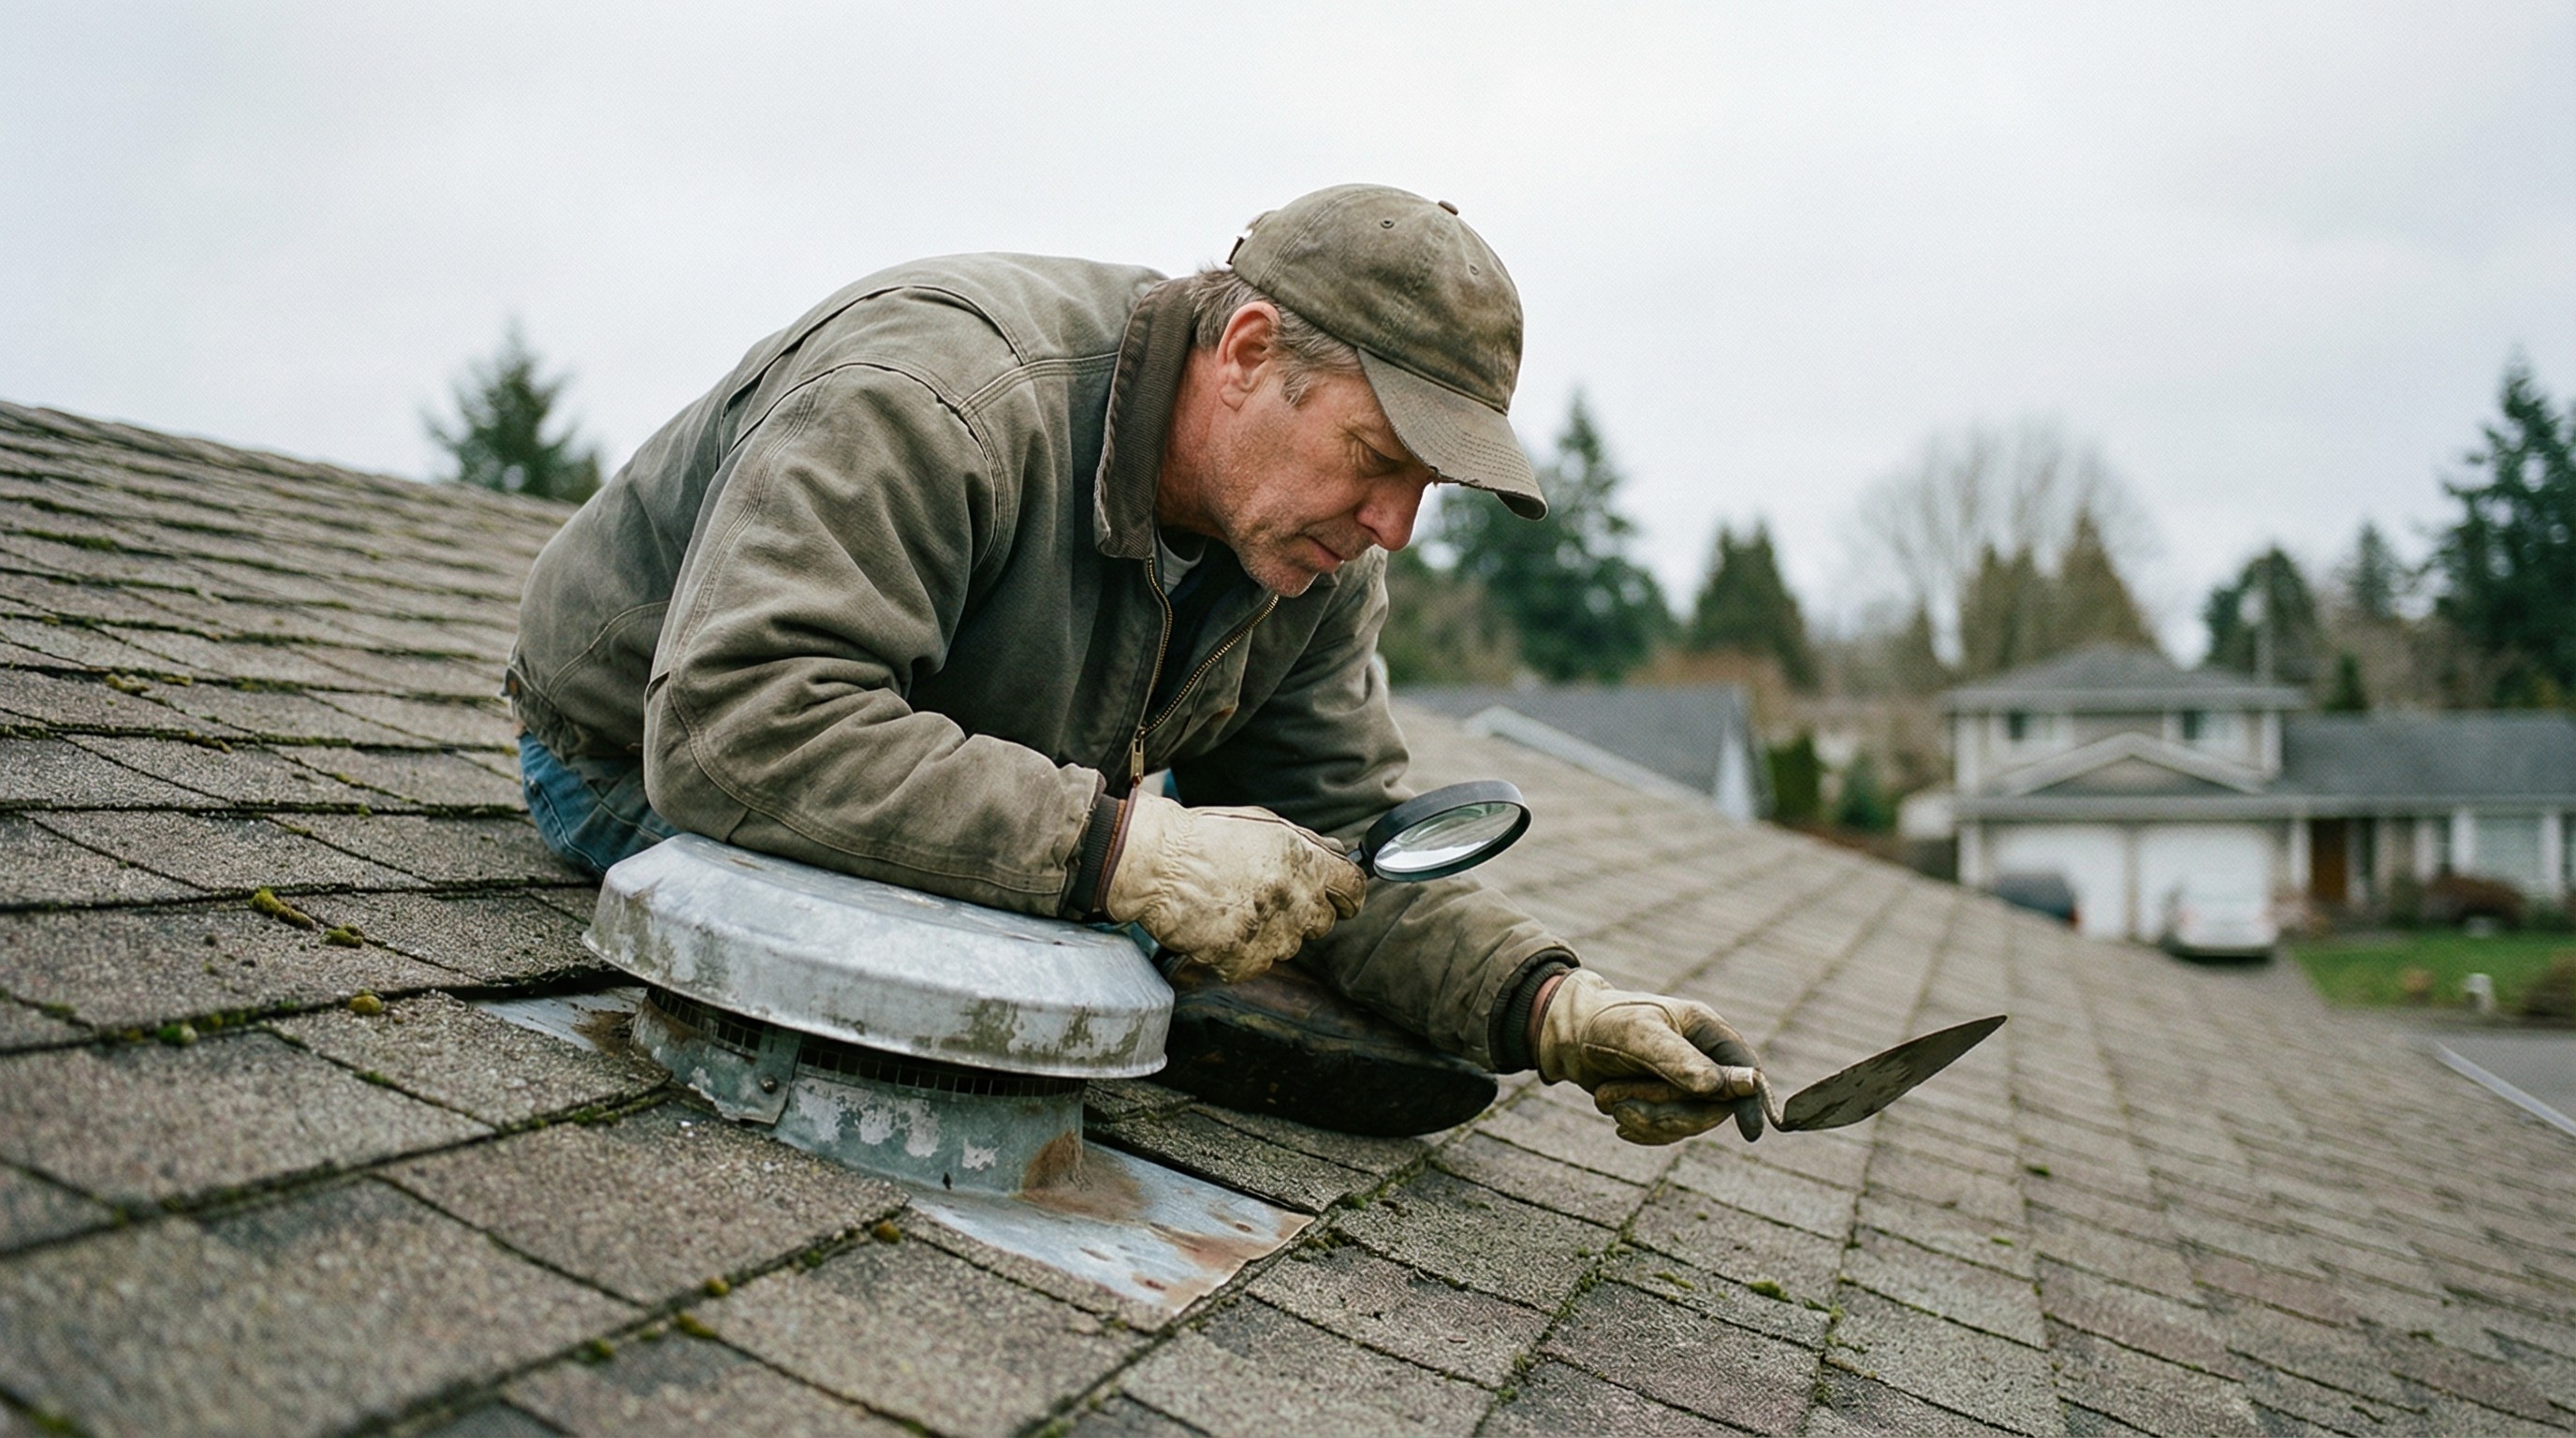
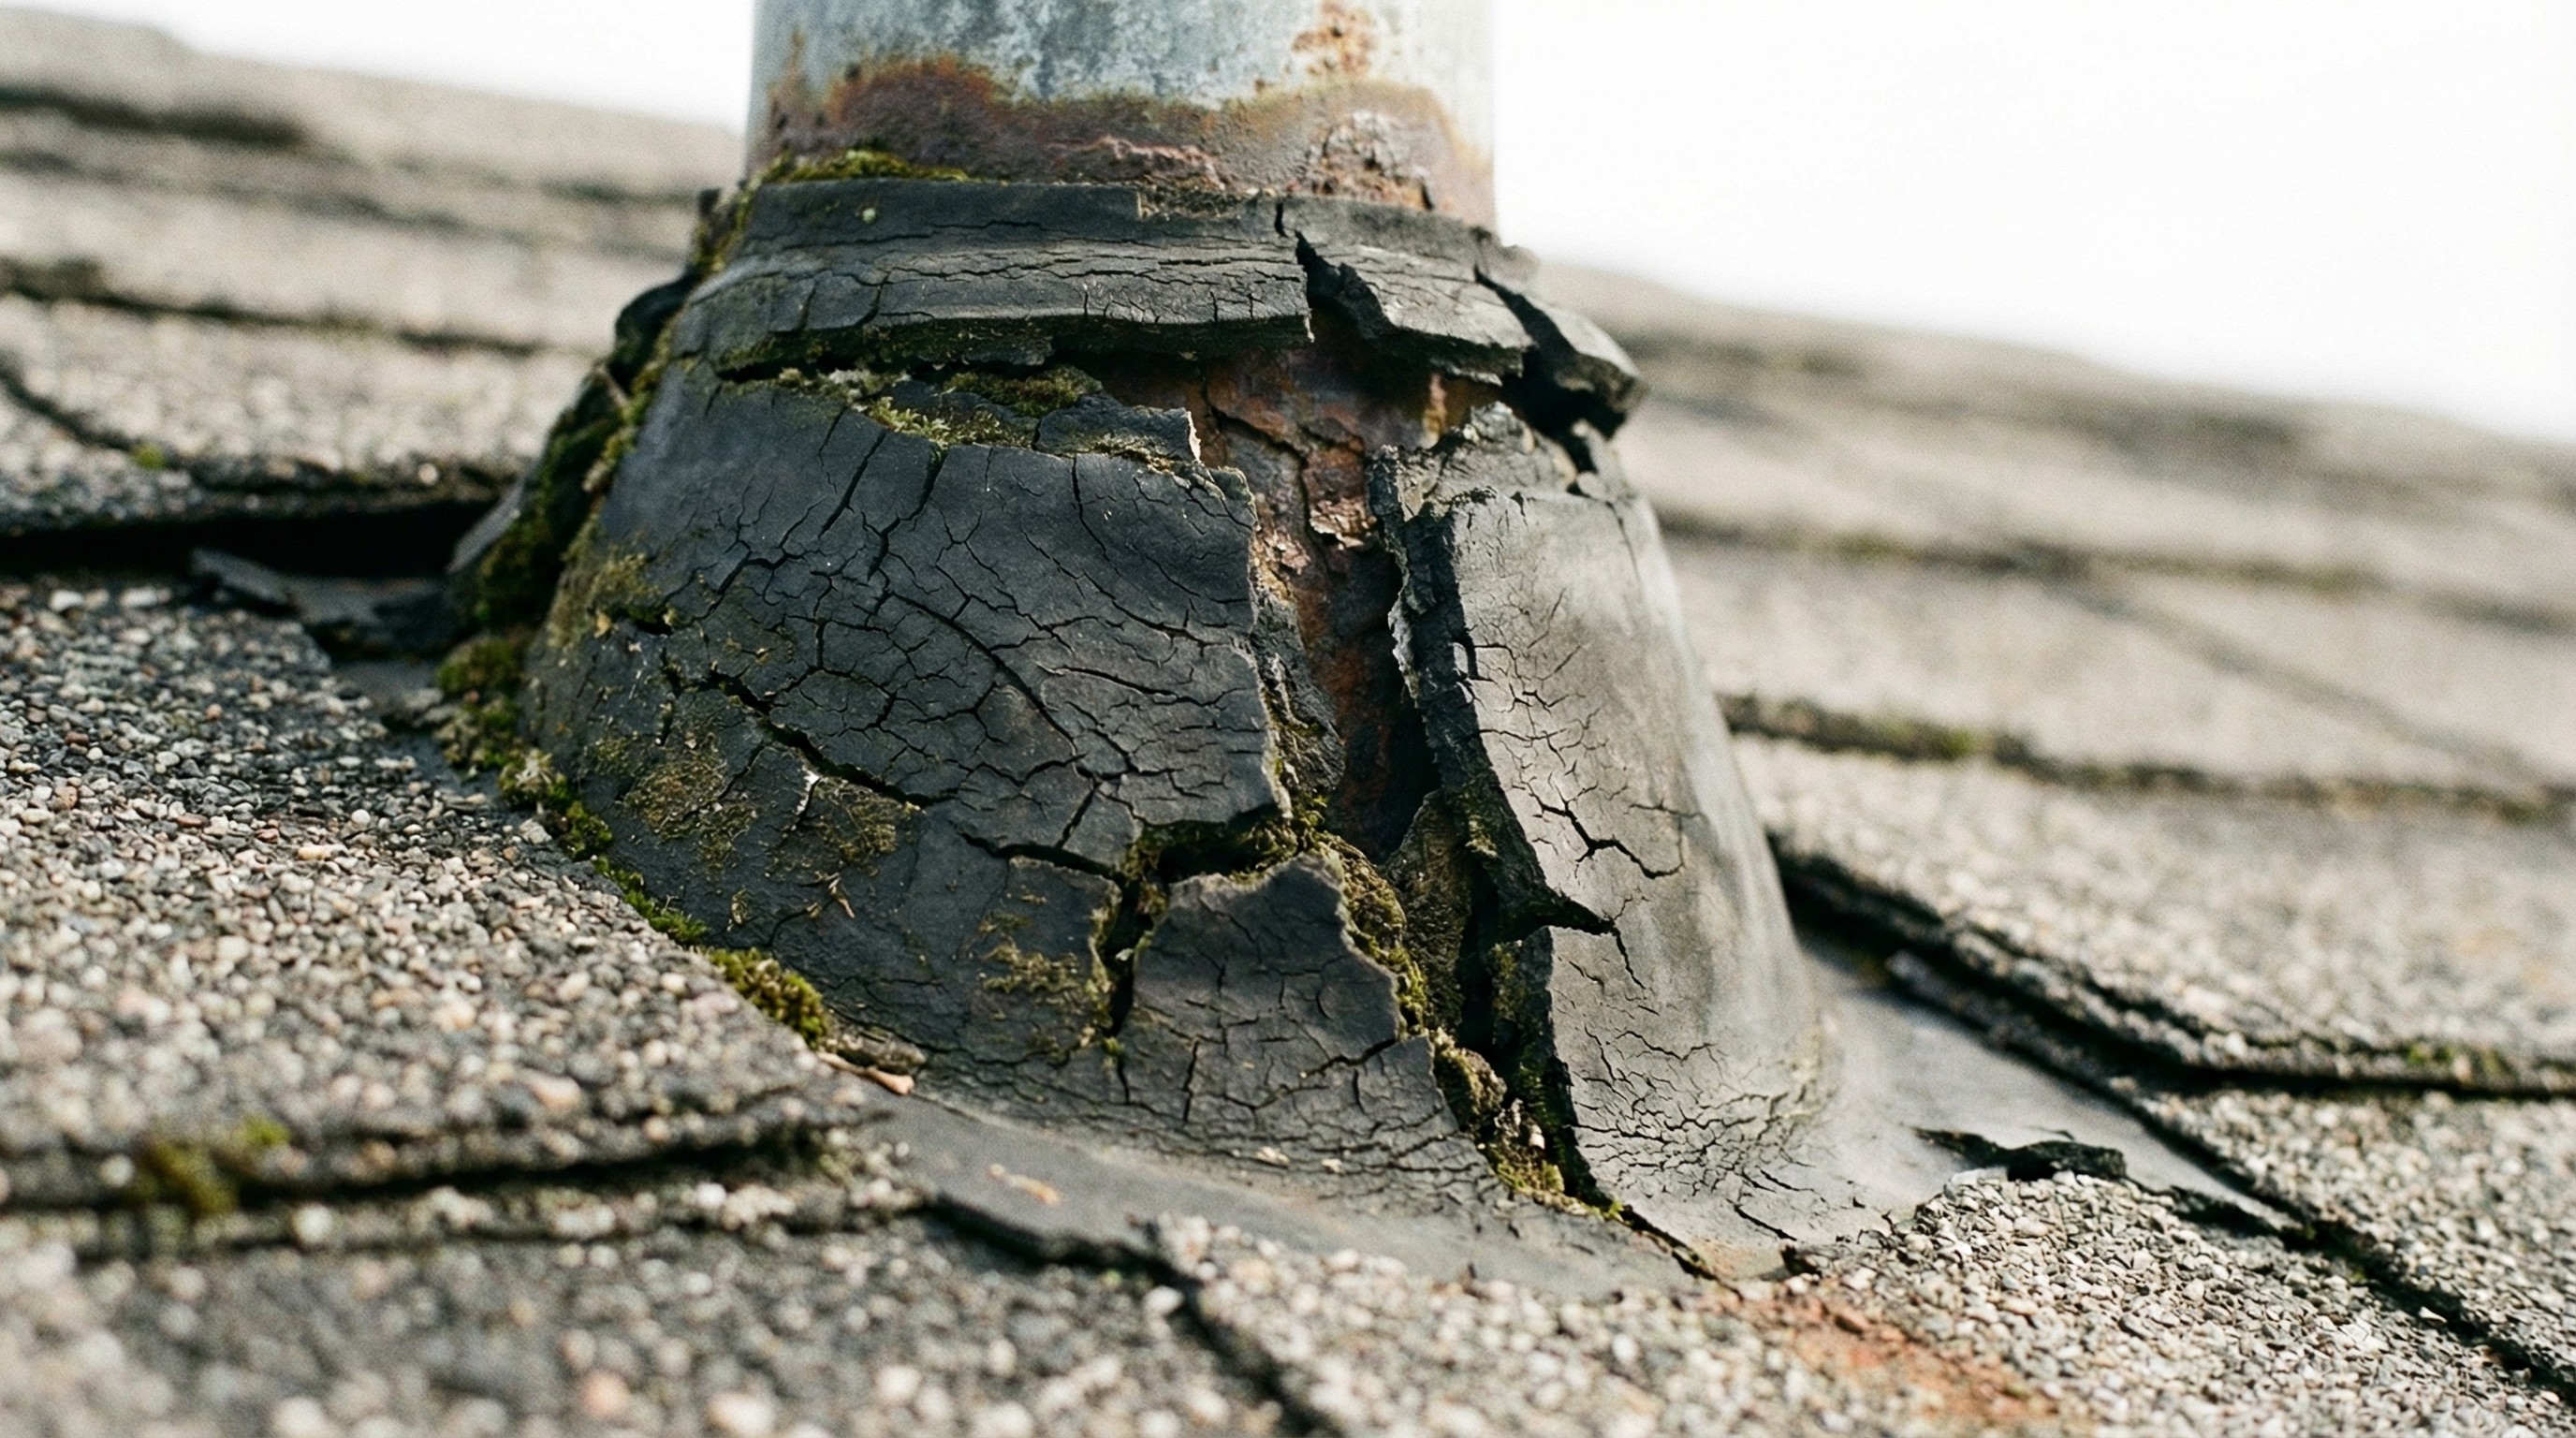
Failed pipe boots and vent seals
A pipe boot is the rubber gasket that wraps around plumbing vents poking through your roof. Rubber degrades in sun and weather, eventually cracking and allowing water to seep in around the pipe.
Pipe boot failure is extremely common and often overlooked during inspections. The rubber can look fine from the ground but have hairline cracks up close.
Clogged gutters and downspouts
When gutters fill with leaves and debris, water backs up and can seep under shingles at the roof edge. In winter, backed-up water freezes and creates ice dams that force water under your roofing material.
Regular gutter cleaning prevents this type of leak entirely.
Gaps around chimneys and skylights
Chimneys and skylights require multiple sealing layers: flashing, caulk, and sometimes counter-flashing. Any of these layers can fail over time, and because chimneys and skylights interrupt the roof surface, they are naturally leak-prone.
Roof leak repair safety tips
Working on a roof carries real risk. Falls from ladders and roofs send over 164,000 Americans to emergency rooms each year, according to the CDC. Before attempting any repair, take a few precautions seriously.
Wear proper gear: Non-slip shoes with good grip, work gloves, and safety glasses protect you from falls and debris.
Follow ladder safety: Set your ladder on firm, level ground. Extend it three feet above the roof edge. Always face the ladder when climbing, and never lean to reach something.
Avoid bad weather: Wet or icy roofs are extremely slippery. High winds create fall risk. Wait for dry, calm conditions.
Have a spotter: Never work on a roof alone. Keep someone at the ladder base and within earshot in case something goes wrong.
How to fix a leaking roof yourself
For minor leaks, DIY repairs can stop damage quickly and save money. Here are the most common fixes homeowners can handle.
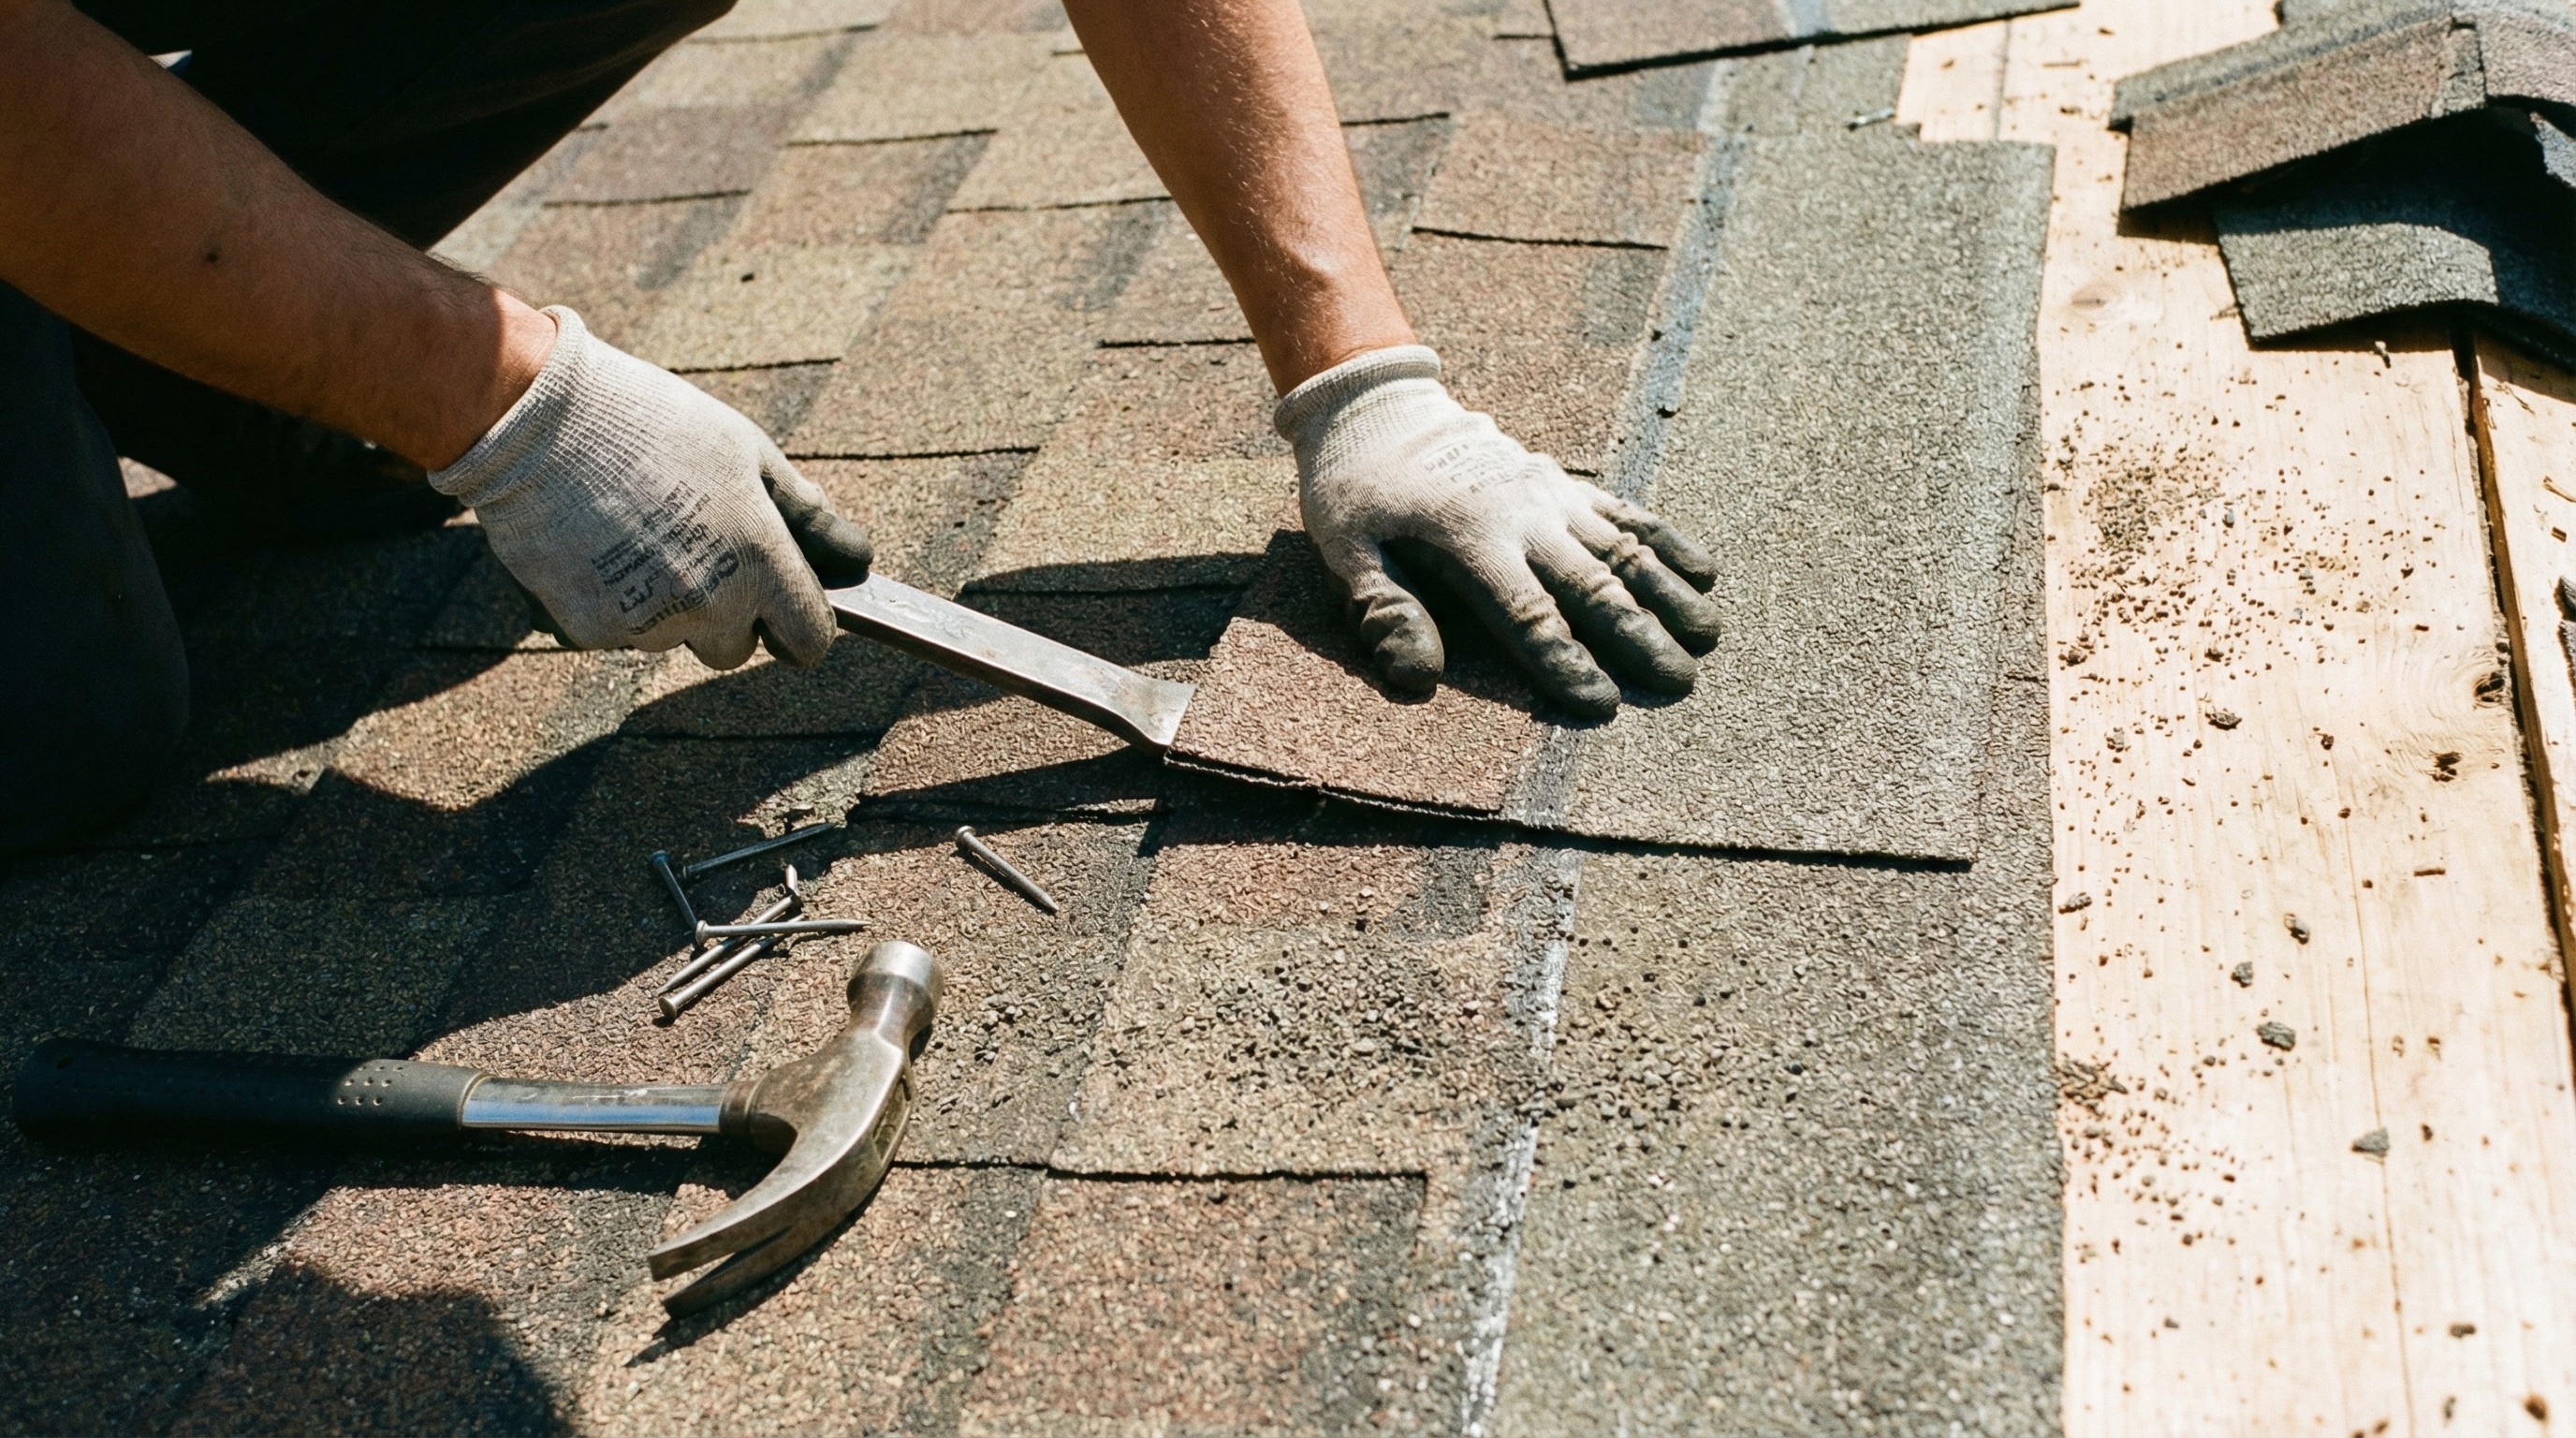
How to replace damaged asphalt shingles
Start by lifting the edges of the shingles surrounding the damaged one. Use a flat pry bar to remove the nails holding the damaged shingle, then slide it out.
Slide your new shingle into place, nail it down with roofing nails, and apply a dab of roofing cement over each nail head to seal it. Press the overlapping shingles back down flat. The entire process typically takes about fifteen minutes once you're familiar with the steps.
How to repair leaky roof flashing
For small gaps in flashing, clean the area thoroughly and apply roofing sealant along the edges. This works well for minor separation where the flashing has pulled away slightly.
If flashing is significantly corroded or damaged, you will want to remove the old piece entirely, install new flashing, and seal all edges with roofing cement. Flashing replacement gets more complex around chimneys because you need to work with 3-4 separate metal pieces that fit together like puzzle pieces. This type of repair often costs $400-800 versus $200-300 for simple flashing fixes.
How to fix a cracked plumbing vent boot
Inspect the rubber boot around each plumbing vent on your roof. Cracks usually appear where the rubber meets the pipe.
For a temporary fix, apply rubber sealant around the crack. For a permanent solution, replace the entire boot. Vent boot replacement is a fairly simple DIY job: you remove the shingles around the boot, pull out the old boot, slide in a new one, and reshingle around it.
How to seal leaks around chimneys and vents
Remove old, cracked caulk with a putty knife. Clean the surface and apply fresh roofing sealant along all seams and edges where different materials meet.
During this repair, also inspect the flashing condition around the area. If flashing around a chimney is badly damaged, the repair gets more involved and might call for professional help.
Emergency roof leak repair
When water is actively coming into your home, stopping the damage takes priority over permanent repairs.
Temporary fixes to stop water damage
Place buckets to catch drips and move furniture and valuables away from the leak. If you can safely access your attic, apply roofing tape or plastic sheeting over the leak source from inside to redirect water into a container.
From outside, roofing cement can temporarily seal accessible spots. Roofing tape also works for small breaches. Neither is a permanent fix, but both buy you time.
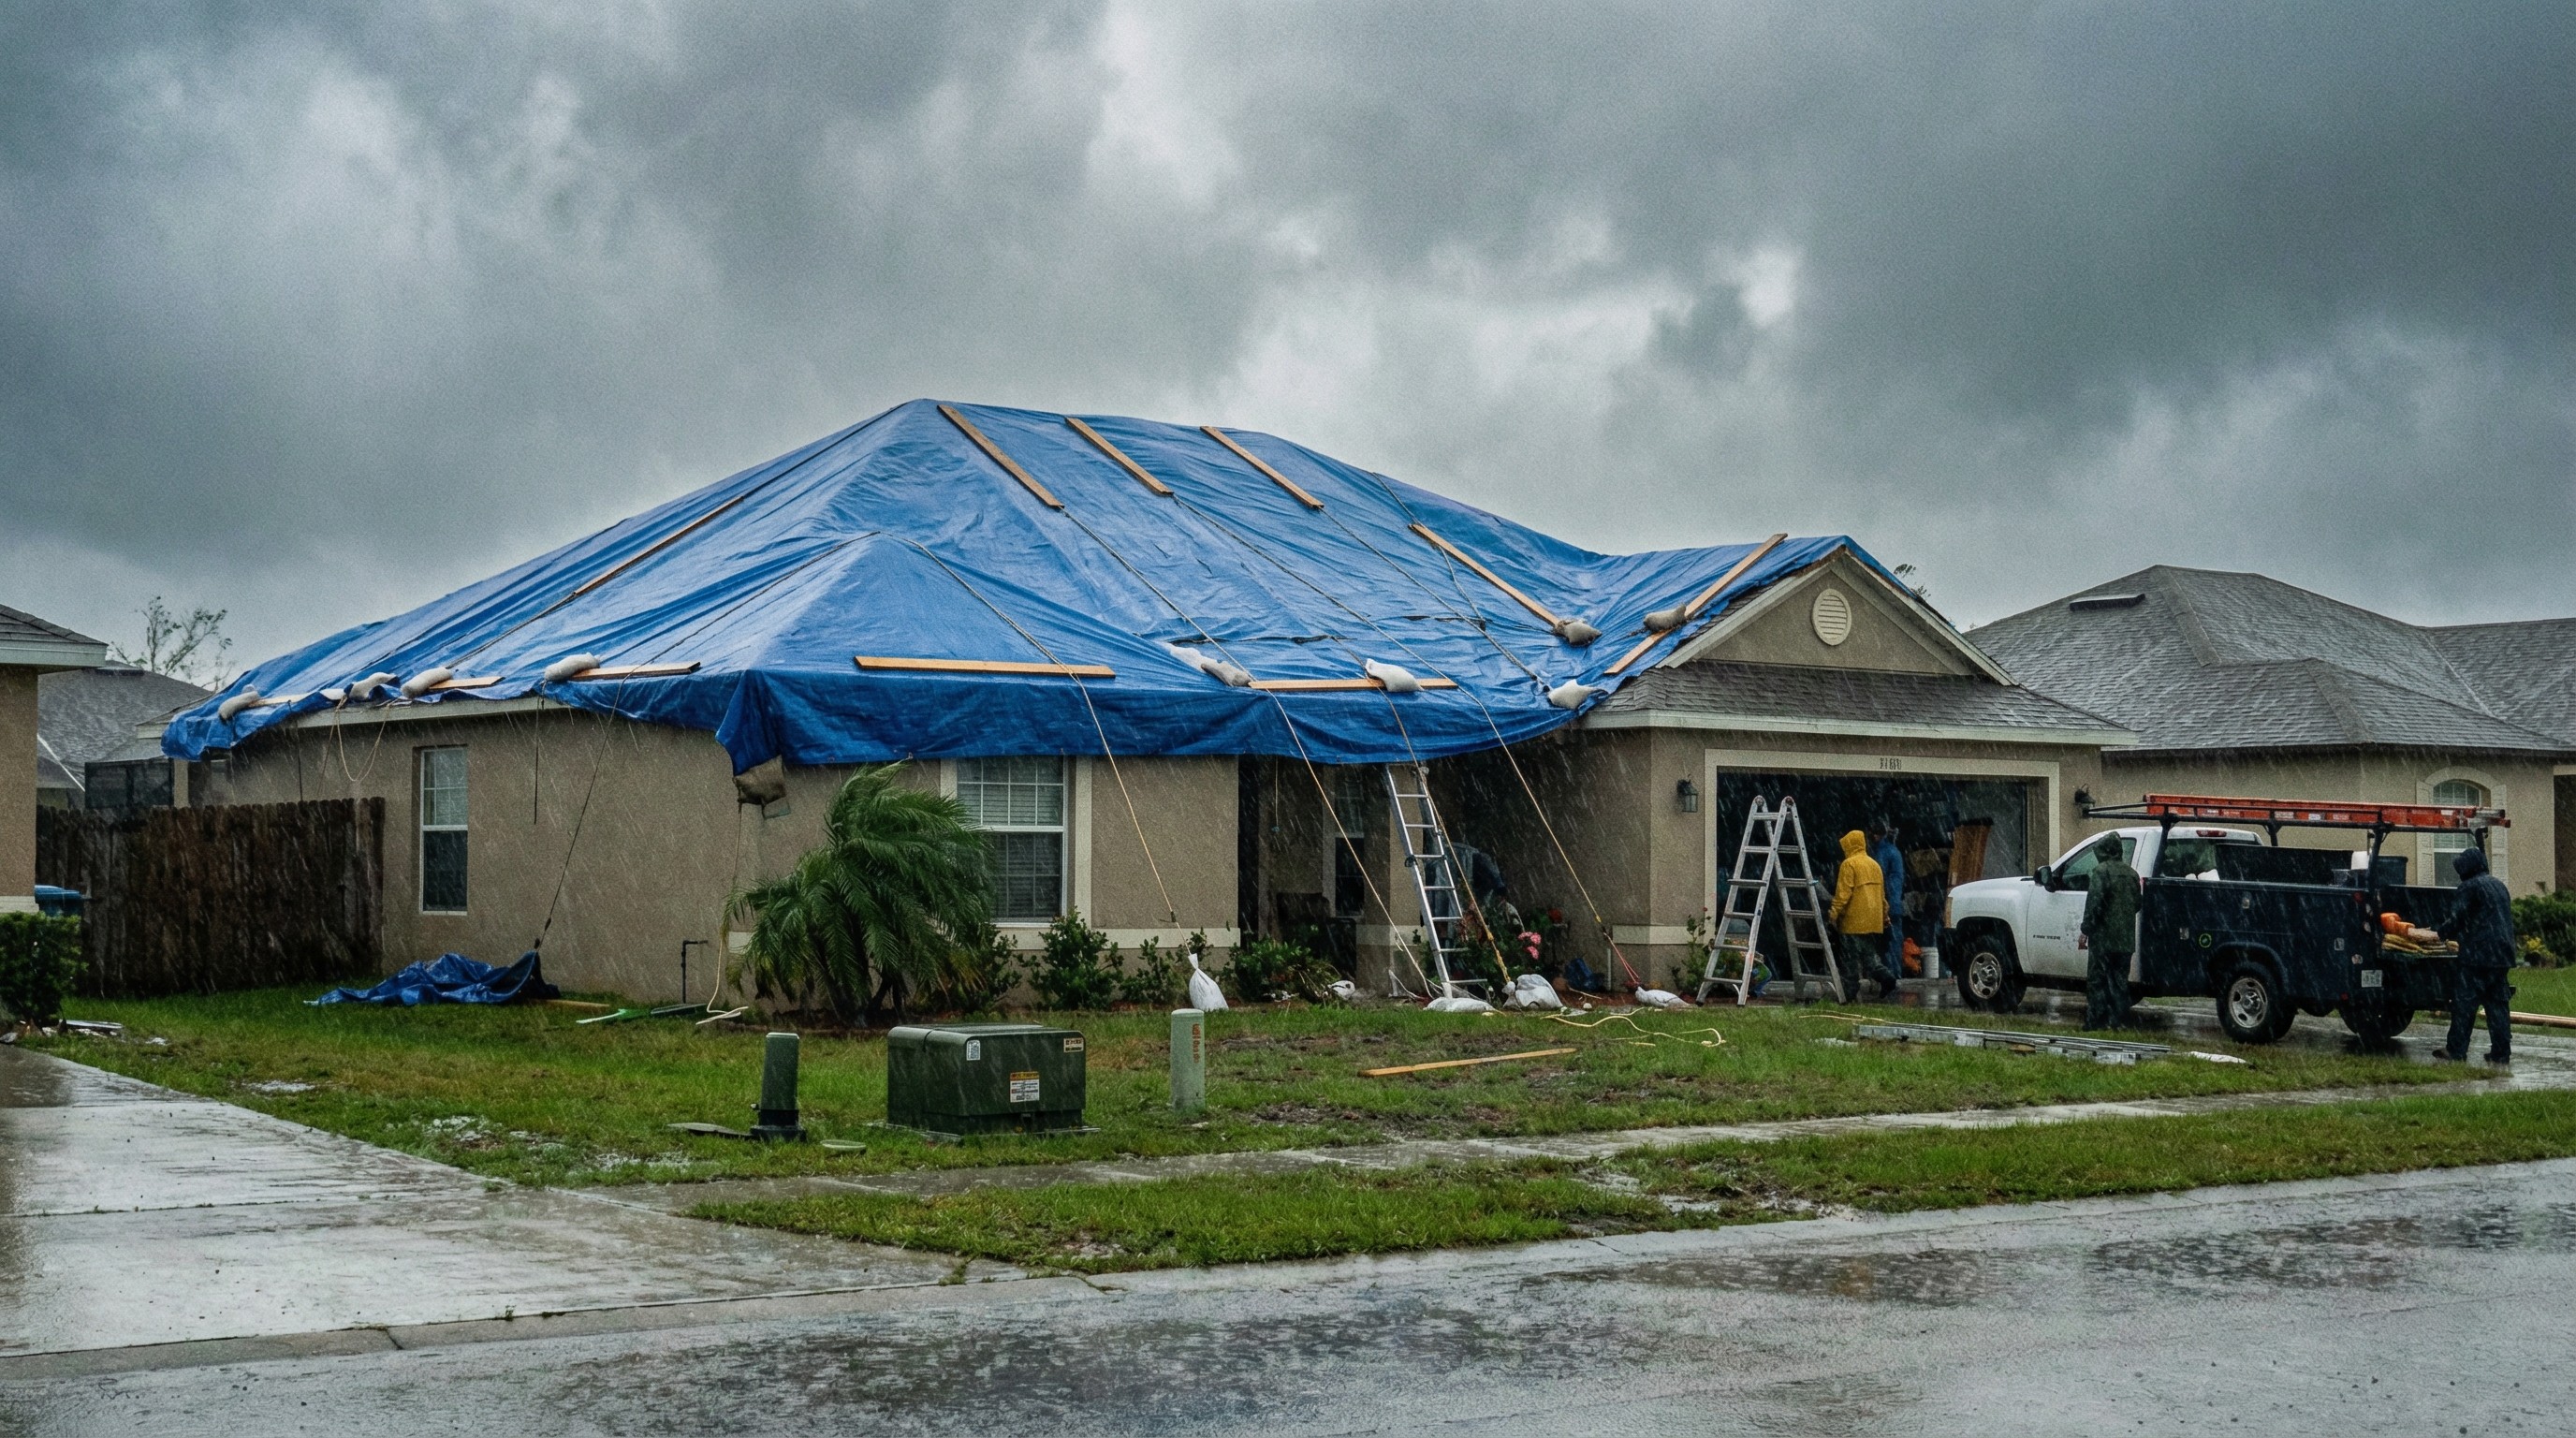
How to tarp a leaking roof
Use a heavy-duty tarp larger than the damaged area. If possible, extend the tarp over the roof ridge so water sheds off both sides.
Secure the tarp with weighted boards rather than nails. Nails create new holes that will leak later. Tuck the edges under shingles when you can to prevent wind from catching the tarp.
When to call for same-day roof leak repairs
Some situations call for immediate professional help:
Active heavy leaking that buckets cannot contain
Water near electrical wiring or fixtures
Visible sagging in the ceiling or roof deck
Storm damage during ongoing severe weather
If any of these apply, call a roofer right away rather than attempting a DIY fix.
How much does roof leak repair cost
Based on our experience with Chattanooga-area repairs, here's what homeowners typically encounter:
Repair Type | Complexity | Typical Cost Range |
|---|---|---|
Single shingle replacement | Simple | $150-$300 |
Pipe boot replacement | Simple | $100-$250 |
Flashing repair | Moderate | $200-$500 |
Chimney leak repair | Complex | $400-$1,000+ |
Multiple leak sources | Complex | $500-$1,500+ |
Note: Chattanooga roof repair costs can vary based on factors like steep rooflines common in the area, local labor rates, and storm-related demand spikes. Always get quotes from local contractors familiar with Chattanooga building codes and weather patterns.
Several factors affect what you will actually pay:
Leak location: Hard-to-reach areas take more time and cost more.
Extent of damage: Water damage to the wood decking beneath shingles increases cost significantly.
Roof pitch: Steeper roofs require additional safety equipment and slow down work.
Emergency timing: After-hours or storm-season repairs typically cost 25-50% more than standard rates.
Quotes can vary between contractors for legitimate reasons: experience level, warranty terms, and material quality all play a role. Extremely low bids often signal cut corners or hidden costs-red flags that experienced homeowners learn to recognize.
When to call a professional for roof leak repairs
Some repairs fall outside DIY territory. Knowing when to call for help protects both you and your home.
Professional help makes sense for tile or slate roofs, which are fragile and require specialized handling. metal roof repairs call for special tools and techniques. Anything involving roof structure or decking replacement benefits from experienced hands.
Watch for signs of structural water damage: sagging ceilings, soft or spongy spots when walking on the roof, visible mold growth, or rotted fascia boards. Damage like this goes beyond surface repair.
If you have multiple leaks or recurring problems despite repairs, a professional can diagnose underlying issues that patching alone will not solve. Sometimes what looks like several small leaks is actually one systemic problem.
Roof leak repair vs. full roof replacement
Sometimes repair makes sense. Sometimes replacement is the smarter investment. The decision usually comes down to the age of your roof and how widespread the damage is.
Repair typically makes sense when damage is isolated to a small area, your roof is relatively young, and the rest of the roofing material remains in good condition.
If your asphalt shingle roof is over 15 years old (out of a typical 20-25 year lifespan), putting money into temporary fixes rarely pays off.