

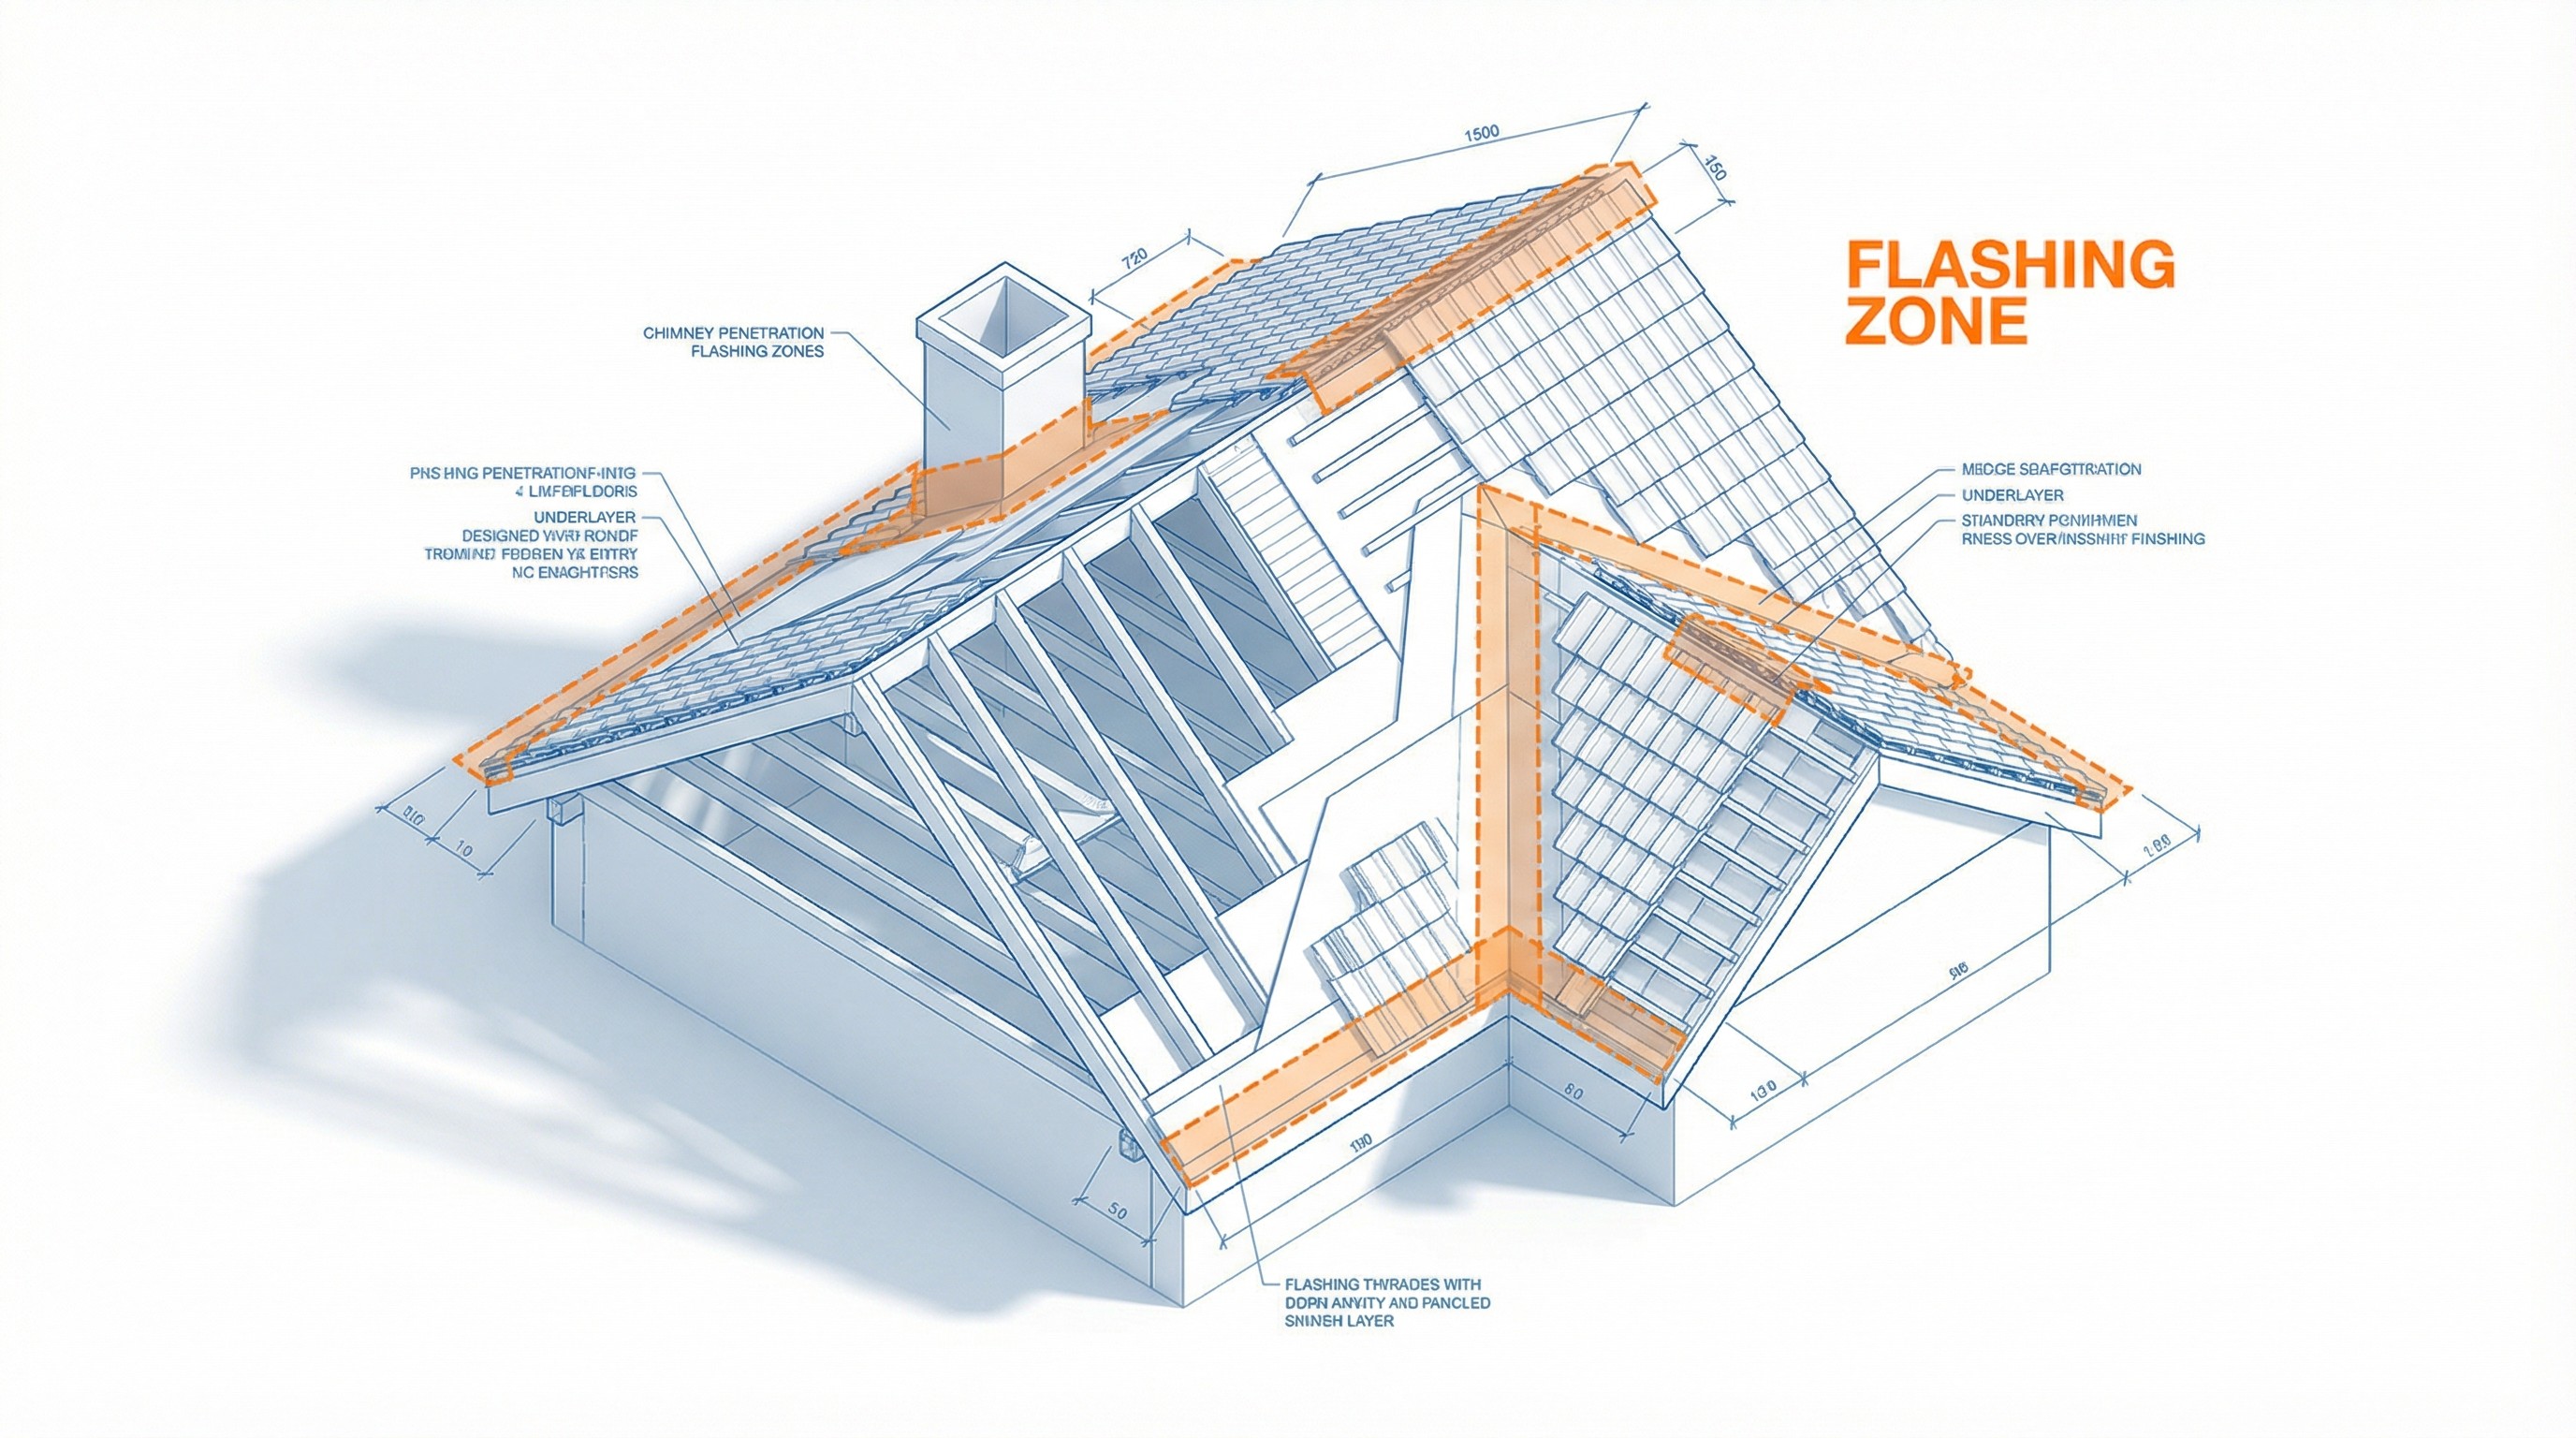
roof flashing is thin metal installed at the joints and edges of your roof to prevent water from seeping into gaps that shingles alone can't seal. You'll find it around chimneys, vents, skylights, and anywhere your roof meets a wall or changes direction.
Here's something that might surprise you: most roof leaks actually don't start with worn-out shingles. Instead, they typically begin where flashing has failed, cracked, or wasn't installed correctly from the start. This guide covers the different types of flashing, what materials work best, and how to spot problems before water damage spreads.
What Is Roof Flashing
Roof flashing is thin metal installed at the joints and edges of your roof to seal gaps and prevent water from getting inside. You'll find flashing around chimneys, vents, skylights, and anywhere your roof meets a wall. The metal pieces overlap in a way that directs water down and off your roof instead of letting it seep into cracks.
Shingles do a great job shedding water on flat, open surfaces. But every chimney, vent pipe, or wall creates an interruption where shingles alone can't form a tight seal. Flashing fills that role by bridging the gaps at vulnerable spots.
Why Your Roof Needs Flashing
Shingles are designed for open roof surfaces, not for the complex angles where different parts of your roof come together. Without flashing at those intersections, water would work its way into the gaps and cause rot, mold, and structural damage over time.
Here's what flashing protects:
Joints and intersections: where your roof meets walls, dormers, or other roof planes
Penetrations: around chimneys, vent pipes, skylights, and exhaust fans
Edges: along the perimeter where water runs off into gutters
Even a small gap can let in enough moisture to damage roof decking, insulation, and interior ceilings. You might not notice the problem until it becomes expensive to fix. Properly installed flashing is one of the most important defenses your roof has against hidden water damage.
Types of Roof Flashing
Different roof features call for different flashing designs. The type of flashing you'll see depends on where it's installed and what it's protecting. Here's what you need to know about each type.
Step Flashing
Step flashing consists of L-shaped metal pieces installed in a stair-step pattern where a sloped roof meets a vertical wall. Each piece overlaps the one below it, and shingles weave between them. This layered approach channels water away from the wall instead of letting it pool at the intersection.
You'll typically find step flashing along dormers, sidewalls, and anywhere a roof slope runs alongside a vertical surface. The "stepping" pattern is what makes it effective, since each piece catches water from the piece above and directs it onto the shingles below.
Counter Flashing
Counter flashing covers the top edge of step flashing to add a second layer of protection. On brick or stone walls, roofers embed counter flashing into the mortar joints. This prevents water from sneaking behind the step flashing where it meets the wall.
Think of counter flashing as a cap that protects the vulnerable top edge of step flashing. Without it, water running down the wall could get behind the step flashing and cause leaks.
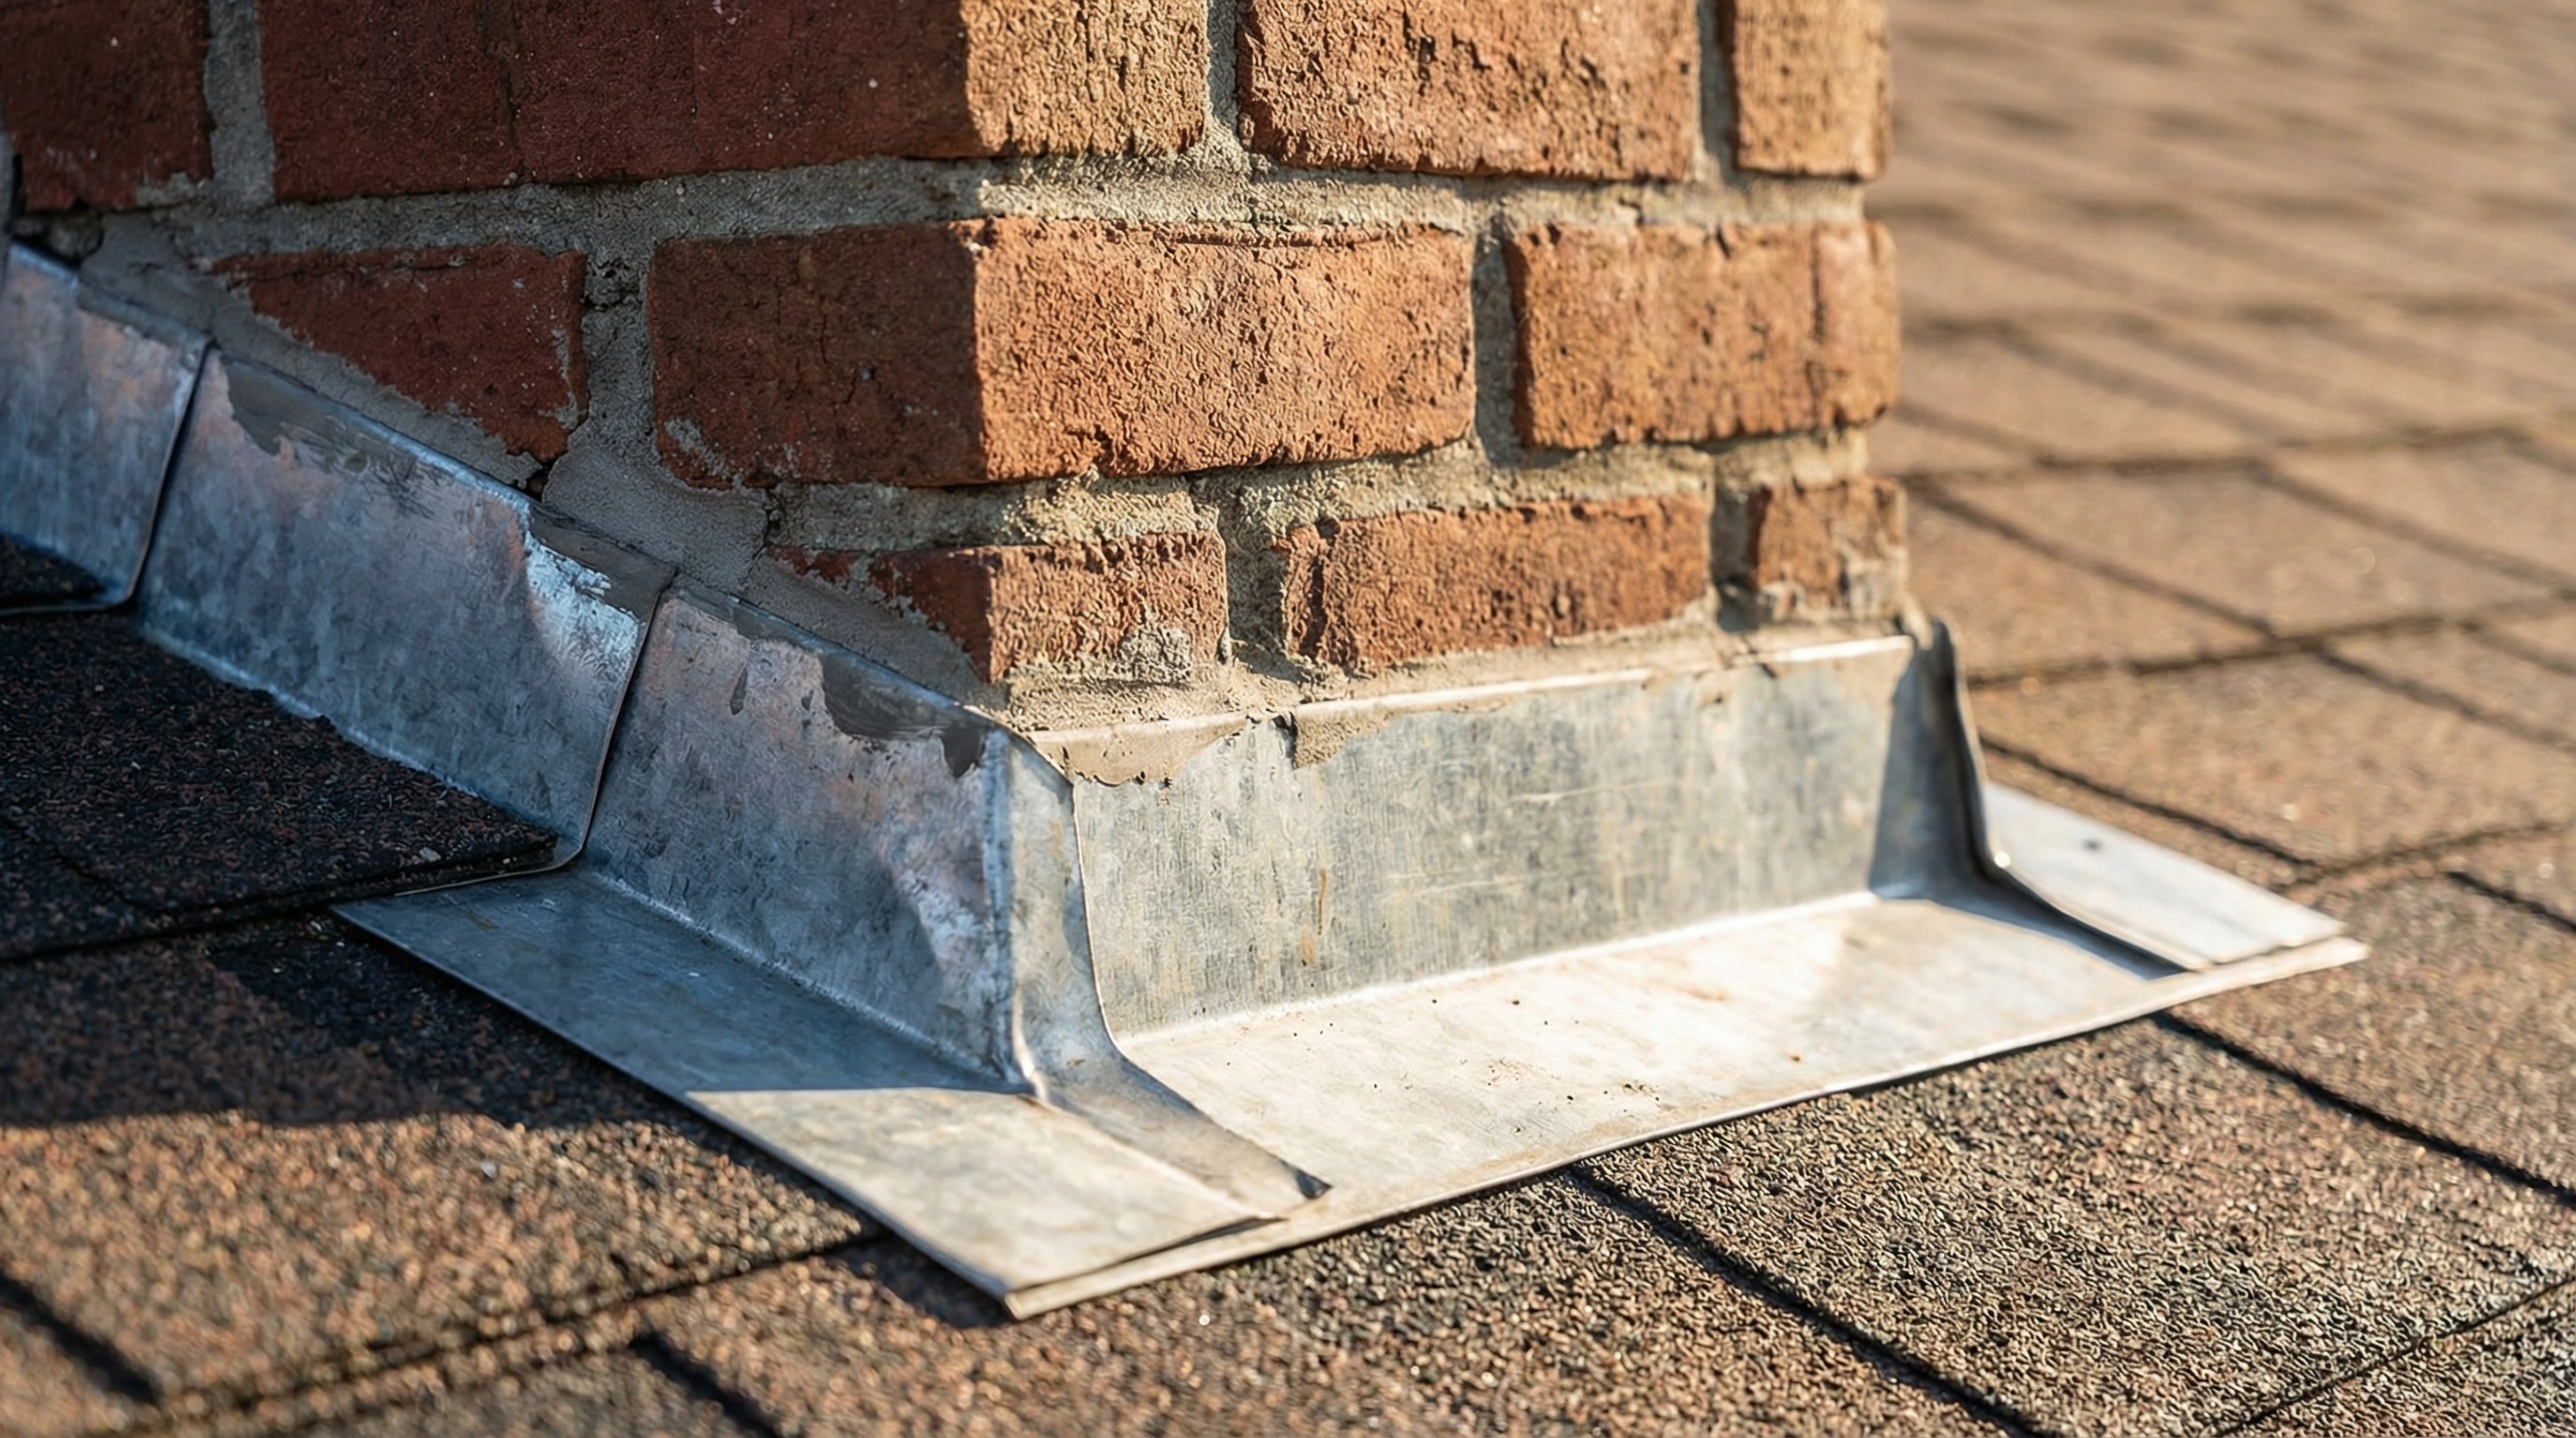
Chimney Flashing
Chimney flashing is actually a multi-piece system that combines step flashing on the sides, counter flashing embedded in the masonry, and additional pieces at the front and back of the chimney. Because chimneys interrupt the roof from all directions, they require the most complex flashing installation of any roof feature.
Chimney leaks are among the most common roofing problems homeowners face. In almost every case, the culprit is failed or improperly installed flashing rather than the chimney itself.
Valley Flashing
Valley flashing is a metal sheet installed where two roof slopes meet and form a V-shaped channel. Valleys handle large volumes of water during rainstorms, so valley flashing is typically wider and more visible than other types.
Some roofers use "closed" valleys where shingles cover the metal completely. Others prefer "open" valleys where the metal remains exposed. Both approaches work when installed correctly, though open valleys tend to handle heavy water flow better.
Drip Edge Flashing
Drip edge is L-shaped metal flashing installed along the edges of your roof. It guides water off the roof edge and into your gutters while protecting the underlying wood from moisture damage.
Most building codes now require drip edge on new roofs. If your home was built before drip edge requirements existed, you might not have it. Over time, missing drip edge can lead to fascia board rot where water repeatedly soaks into the wood.
Vent Pipe Flashing
Vent pipe flashing, also called pipe boots, seals around plumbing vents and other pipes that poke through your roof. A typical pipe boot has a metal base with a rubber collar that fits snugly around the pipe.
The rubber portion of pipe boots tends to crack and fail before metal flashing does. Many homeowners find that pipe boots need replacement at least once during a roof's lifespan, even when everything else is still in good shape.
Headwall Flashing
Headwall flashing is installed where a sloped roof meets a vertical wall at the top of the slope. The flashing tucks under the siding above and extends over the shingles below, creating a waterproof transition between the two surfaces.
Kickout Flashing
Kickout flashing is a small but important piece installed at the bottom of roof-to-wall intersections. It diverts water away from the wall and into the gutter. Without kickout flashing, water can run down the wall and cause hidden damage inside the wall cavity.
Many older homes are missing kickout flashing entirely. Adding it during a reroof is an inexpensive way to prevent future water damage to your walls.
Roof Flashing Materials
Flashing comes in several materials, and each has different durability, cost, and best uses. Here's how they compare:
Material | Typical Lifespan | Relative Cost | Best For |
|---|---|---|---|
Galvanized steel | 15-25 years | Low | General use, budget projects |
Aluminum | 20-30 years | Low to moderate | Coastal areas, lighter applications |
Copper | 50+ years | High | Visible areas, historic homes |
Lead | 50+ years | Moderate to high | Complex shapes, chimneys |
Rubber/Plastic | 10-15 years | Low | Vent pipe boots |
Galvanized Steel Flashing
Galvanized steel is the most common flashing material on residential roofs. It's affordable and holds up well for decades, though the protective zinc coating can wear over time and allow rust to develop. For most homes, galvanized steel performs reliably without breaking the budget.
Aluminum Flashing
Aluminum won't rust, which makes it popular in coastal areas where salt air corrodes other metals faster. It's lightweight and easy to work with. Keep in mind that aluminum can corrode when it comes into contact with concrete or certain other metals, which is why proper placement is crucial.
Copper Flashing
Copper is the premium choice for flashing. It lasts 50 years or more and develops an attractive green patina as it ages.
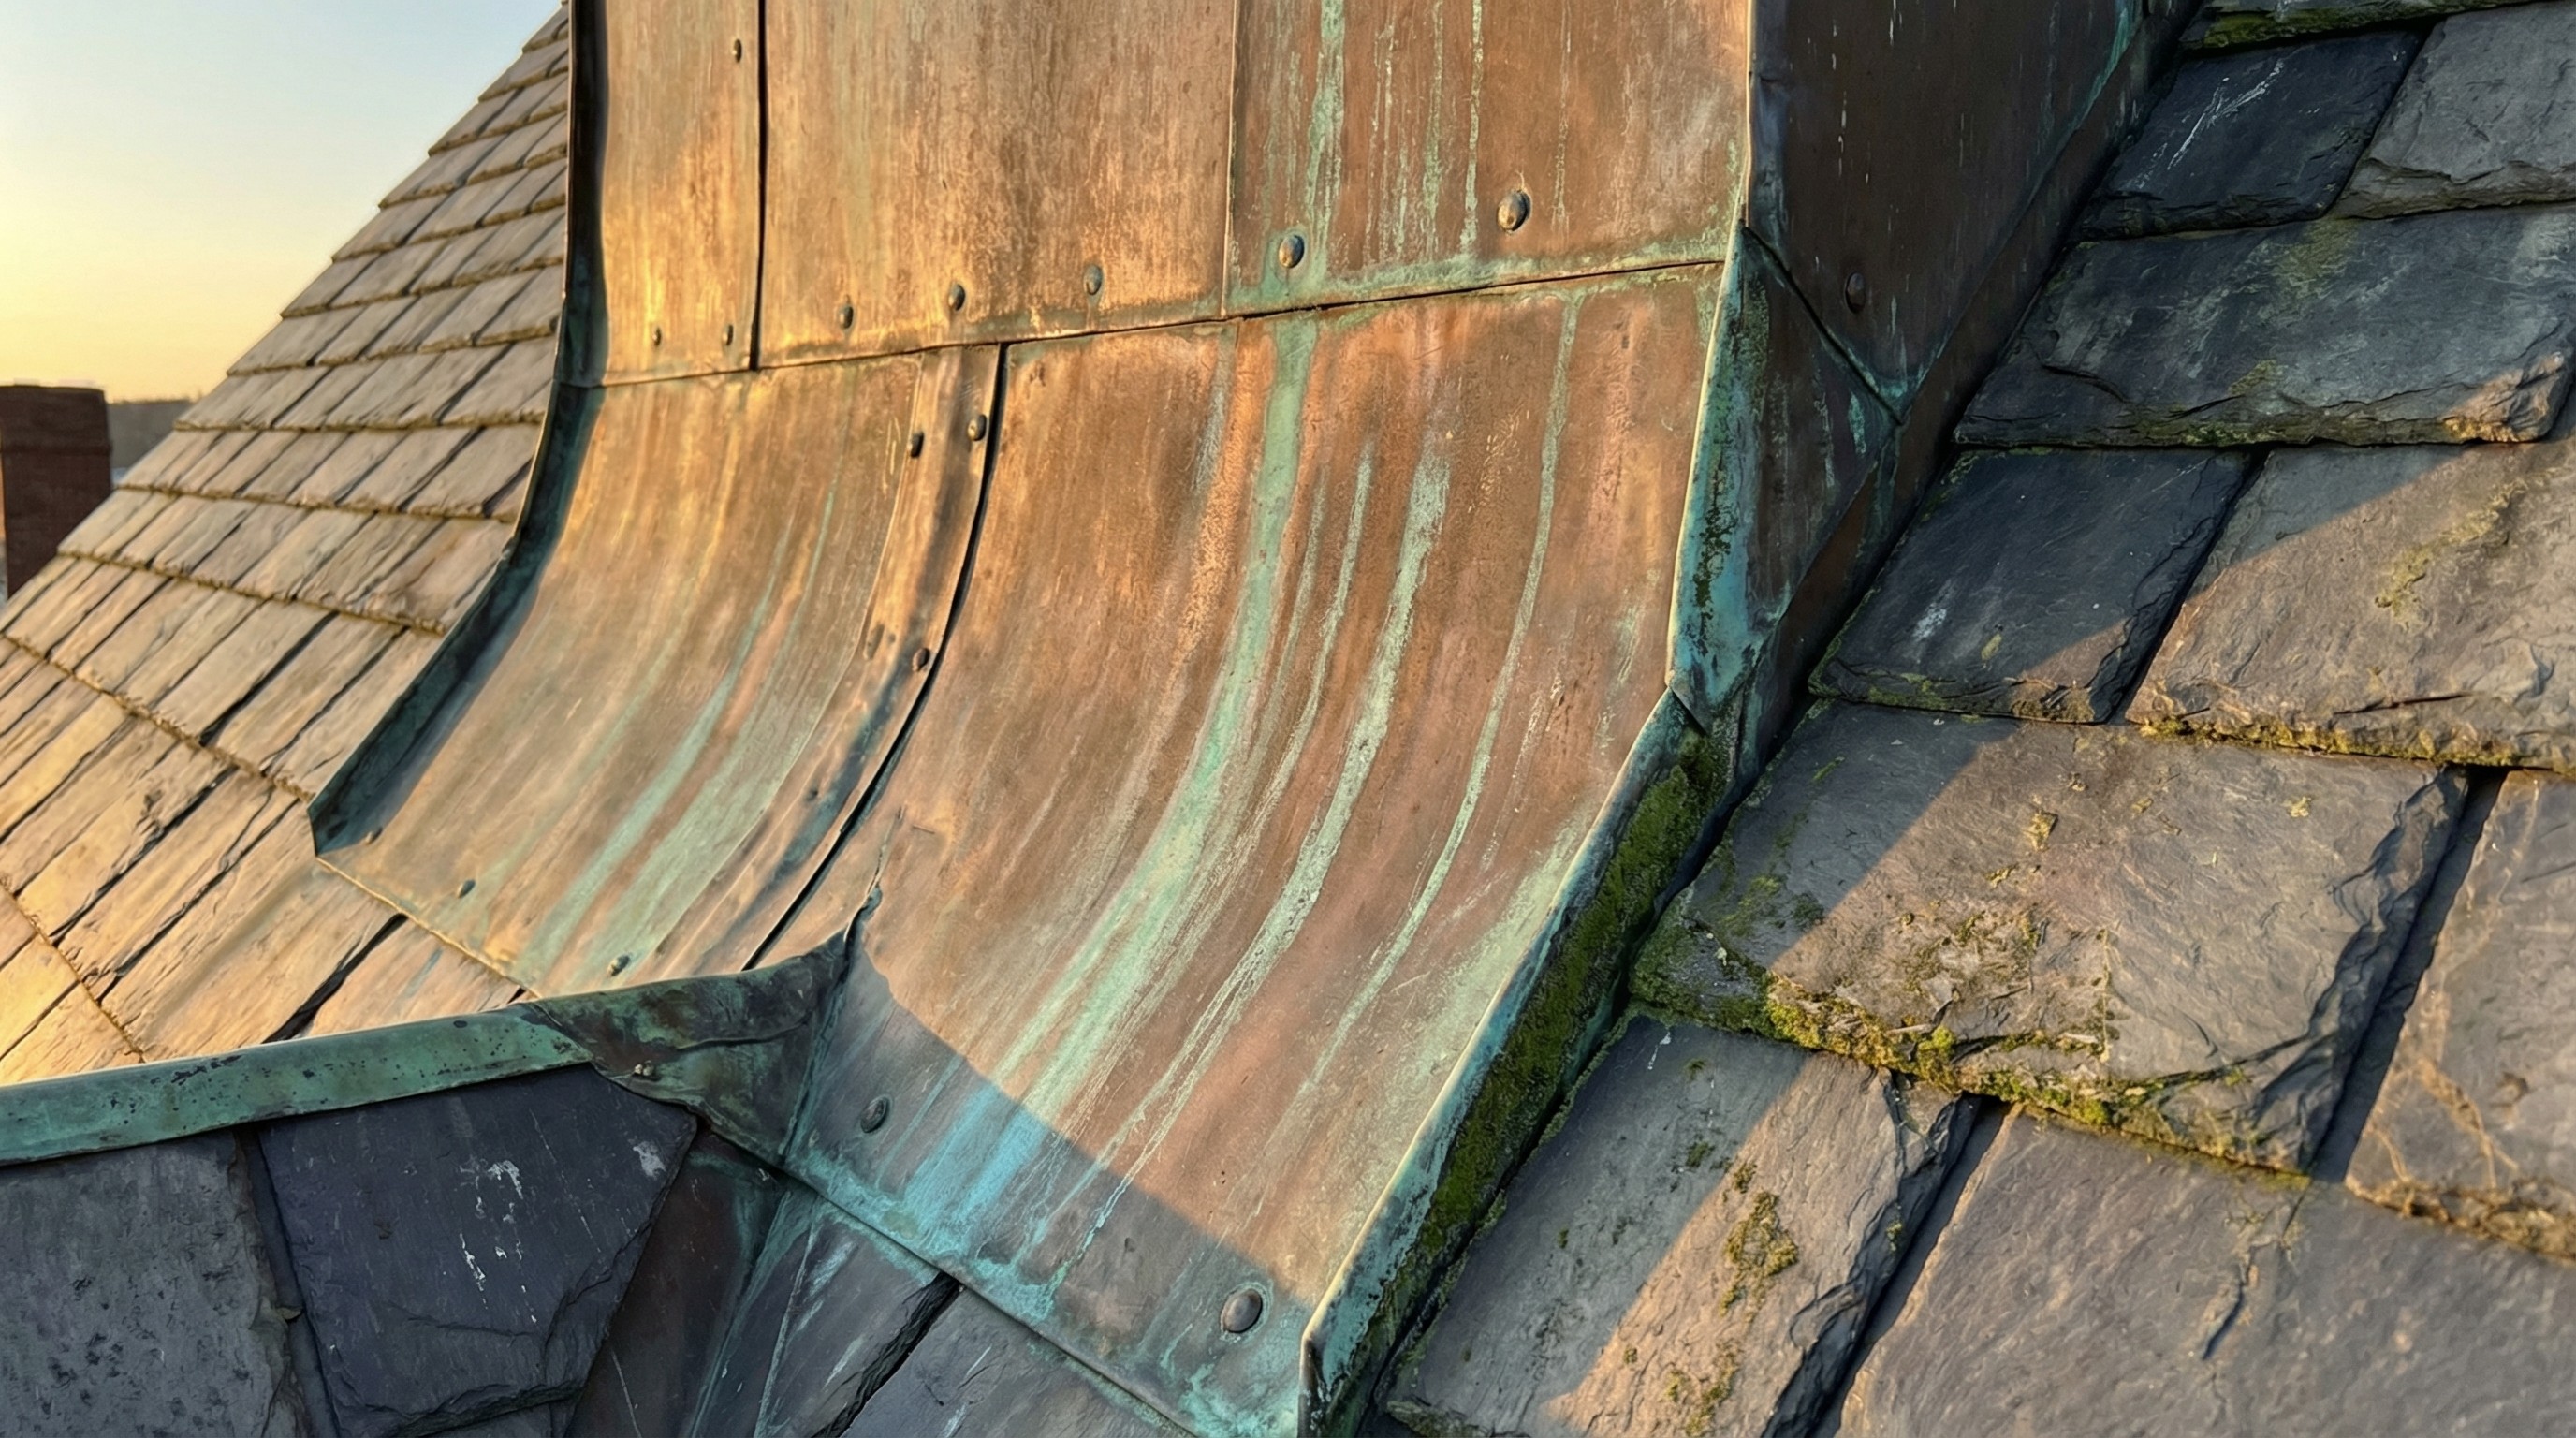
You'll often see copper flashing on historic homes or in visible locations where appearance matters. The main consideration with copper is the higher upfront investment, as it costs significantly more than steel or aluminum options.
Lead Flashing
Lead is extremely moldable, which makes it ideal for complex shapes around chimneys and other irregular features. It's less common today due to cost and health concerns during installation, but lead remains effective where flexibility is the priority.
Rubber and Plastic Flashing
You can expect to replace rubber boots at least once during your roof's lifetime, and potentially sooner if you live in an area with extreme temperature fluctuations.
How Roof Flashing Is Installed
Proper flashing installation follows one key principle: water flows downhill, so each layer overlaps the one below it. This ensures water always flows over flashing, never under it.
Here's what correct installation involves:
Layering with shingles: flashing is installed as shingles are laid, not added afterward
Proper overlap: each piece covers the one below by several inches
Sealant at joints: roofing cement or caulk at critical connections
Secure fastening: nails placed where they'll be covered by the next layer
The installation process varies by flashing type and location. Step flashing requires weaving individual pieces between shingle courses as the roof is built up. Valley flashing, on the other hand, is laid in one continuous sheet before shingling begins.
Tip: Flashing installed on top of existing shingles during a quick repair often fails prematurely. If a contractor suggests this approach, ask why they're not integrating the flashing properly with the shingle layers.
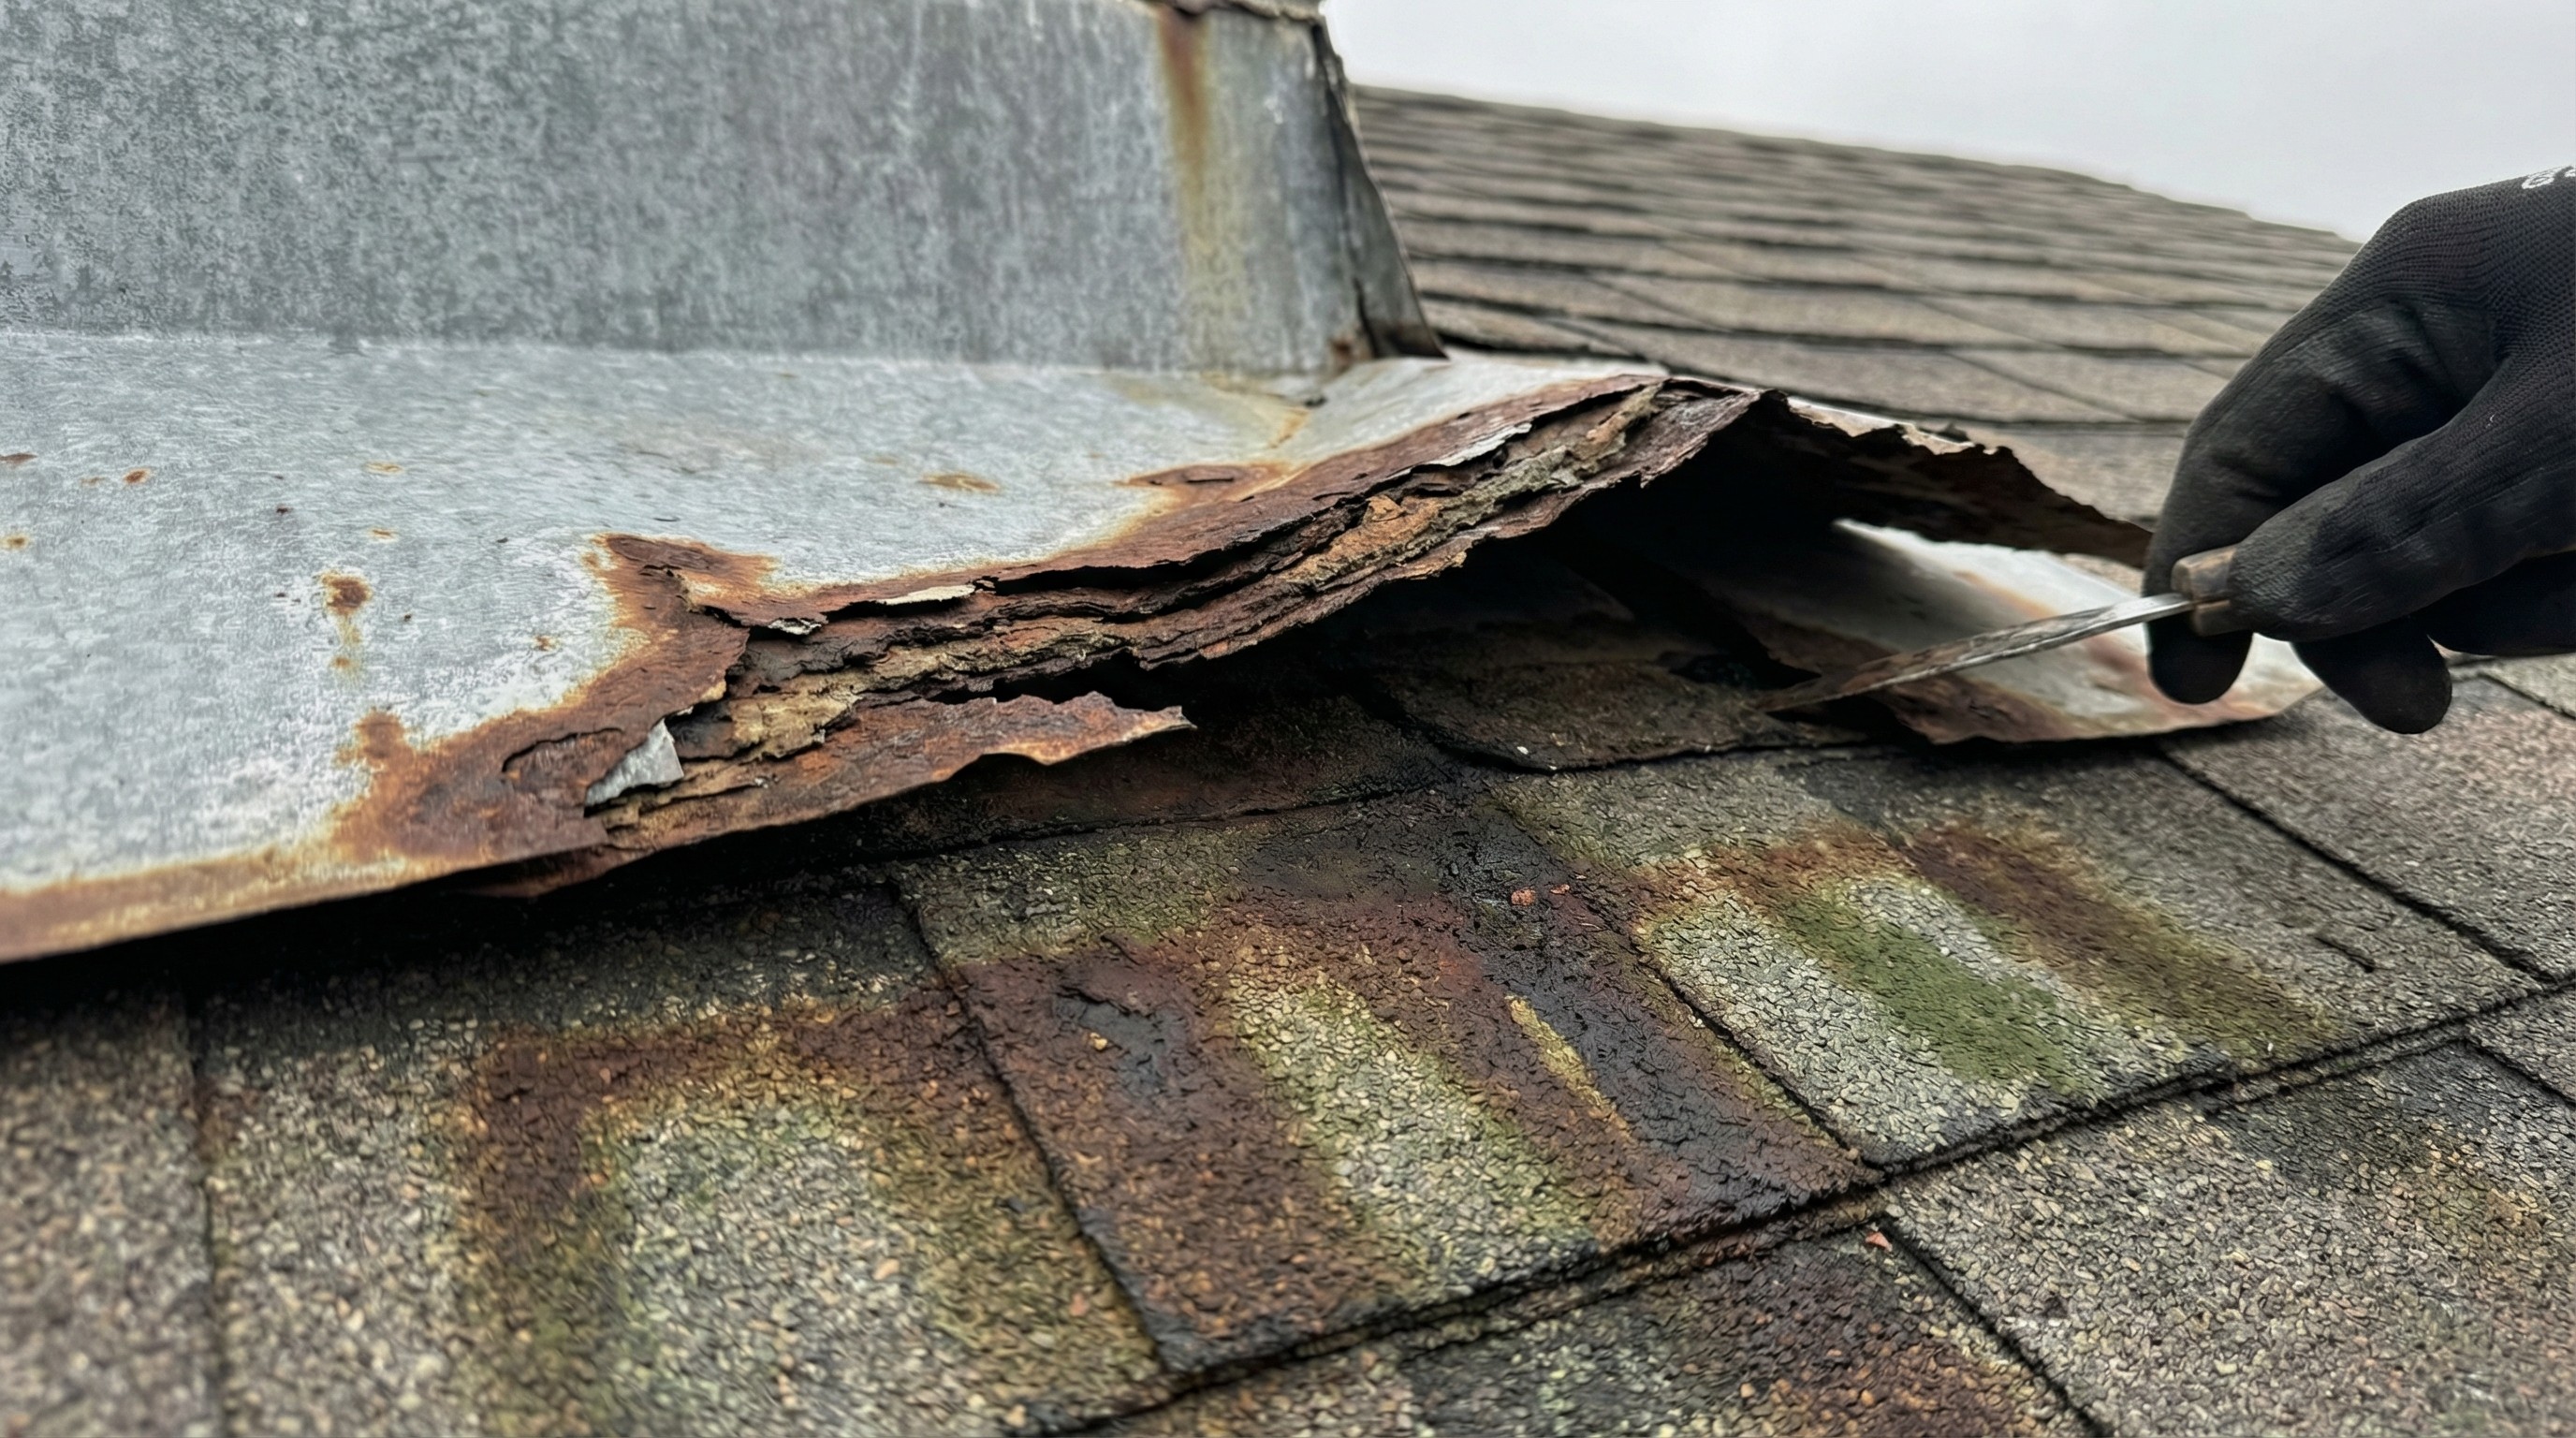
Signs Your Roof Flashing Needs Repair
Flashing problems don't always announce themselves with obvious dripping. Water can travel along rafters and show up far from the actual leak. As a roofing expert, I recommend watching for these warning signs:
Visible rust, cracks, or lifted edges on any flashing
Water stains on ceilings or walls near chimneys, skylights, or roof-to-wall intersections
Missing or loose flashing pieces after storms
Peeling paint or damp spots on exterior walls below where the roof meets a wall
If you notice any of these warning signs, I strongly recommend having a qualified roofer inspect your flashing immediately. Early detection can prevent water damage from spreading to hidden areas of your home, potentially saving you thousands in repair costs.
How Flashing Appears in Roofing Quotes
When comparing roof replacement quotes, look for flashing as a separate line item. Vague language like "flashing as needed" or "standard flashing included" doesn't tell you what you're actually getting.
A detailed quote specifies:
Which types of flashing are included (step, valley, drip edge, etc.)
What material will be used (galvanized steel, aluminum, copper)
Whether existing flashing will be replaced or reused
Reusing old flashing on a new roof is sometimes appropriate if the existing flashing is in good condition. However, it often makes sense to replace everything while the roof is open and accessible. Ask your contractor to explain their approach so you understand what you're paying for.


