

Standing seam metal roof installation creates the longest-lasting residential roofing system available, with lasting 40-70 years. Whether you are replacing worn asphalt shingles with a premium upgrade or building a new home, understanding the standing seam metal roof installation process, required materials, and true costs helps you make better decisions about DIY versus hiring professionals. This guide covers the 7-step standing seam metal roof installation process, materials and tools needed, cost breakdowns, and common mistakes to avoid.
What Is Standing Seam Metal Roofing?
Standing seam metal roofing is a premium system with vertical panels, raised seams, and concealed fasteners that last 40-70 years. This guide focuses specifically on the installation process, materials, and techniques.
For a complete overview of standing seam types, panel options, materials (steel vs aluminum vs copper), colors, finishes, and detailed pros and cons, see our standing seam metal roof buyer's guide.
Materials Needed for Standing Seam Installation
Professional standing seam metal roof installation requires specific materials and components. Here's what goes into a complete system.
Roof Decking: Solid substrate required, typically 7/16" OSB minimum or 1/2" plywood. The deck must be flat and solid since clips fasten directly to it. Existing solid sheathing often works if undamaged.
High-Heat Underlayment: Ice and water shield rated for high temperatures (250°F+) at eaves, valleys, and penetrations. Synthetic underlayment over the entire roof. Standard felt degrades from metal heat reaching 150°F+ in summer sun.
Lock Strips/Starter Strips: Metal strips fastened at eaves and rakes where the first and last panels attach. Create secure starting point for the panel system during standing seam metal roof installation.
Standing Seam Panels: Available in 12", 16", or 18" widths. Common materials include aluminum (lightweight, won't rust), Galvalume steel (strong, cost-effective), and copper (premium, patinas over time). Panels come pre-formed or are roll-formed on-site to exact roof length, eliminating horizontal seams.
Concealed Fastener Clips: The critical component that makes standing seam work. Fixed clips at panel ends and sliding clips in the field allow thermal expansion. Spacing typically 12-18 inches on center per manufacturer specifications. Wrong clip spacing is the most common standing seam metal roof installation mistake.
Trim Components: Eave trim with drip edge, gable/rake trim (3-piece or 4-piece configurations), Z-bar for ridge transitions, ridge cap (vented or solid), valley flashing if needed, pipe boot flashings, and transition flashings. Trim costs $3-8 per linear foot installed.
Fasteners and Sealants: Pancake head screws (#10 or #12 zinc-coated) for clip attachment, butyl tape for trim connections, and metal-specific sealant for penetrations. Standard roofing screws back out; use proper fasteners.
Material costs total $7-12 per square foot for complete standing seam metal roof installation including all components.
7 Steps to Install a Standing Seam Metal Roof
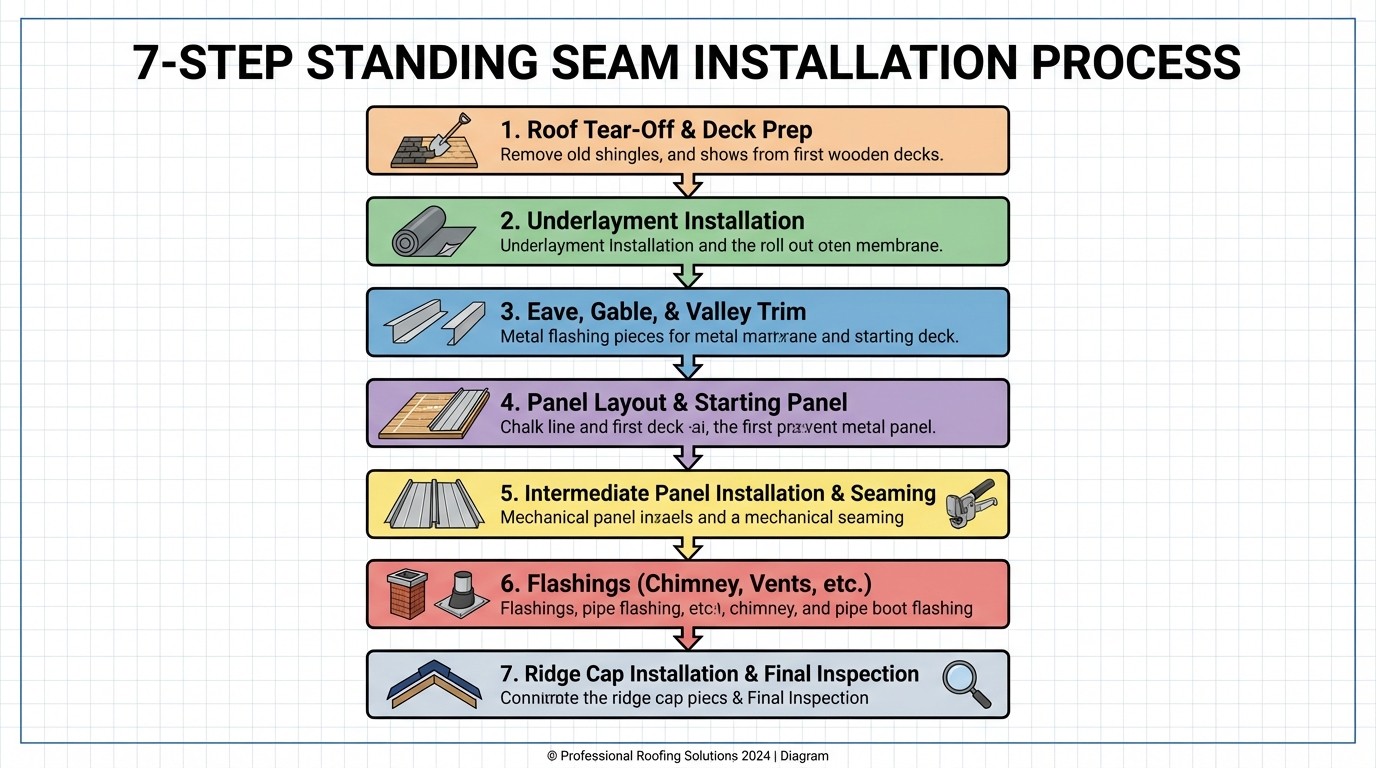
Professional standing seam metal roof installation follows a systematic 7-step process to ensure proper performance and longevity. Here's exactly what happens.
Step 1: Remove Old Roofing Materials
The crew tears off existing asphalt shingles, underlayment, and flashing to expose the roof deck for inspection. Old materials are disposed of in a dumpster. This step takes 1-2 days for most residential roofs and adds $1-3 per square foot to total standing seam metal roof installation cost. Some homeowners install standing seam over existing shingles to save on tear-off, but this is not recommended since it prevents deck inspection and can void warranties.
Step 2: Inspect and Replace Damaged Decking
With the deck exposed, roofers inspect for rot, soft spots, and water damage. Any compromised sections are cut out and replaced with new OSB or plywood. The deck must be solid, flat, and properly fastened since clips will attach directly to it during standing seam metal roof installation. Loose or bouncy decking causes clips to work loose over time. Decking replacement costs $2-4 per square foot but is critical for long-term performance.
Step 3: Install Lock Strips and Underlayment
Lock strips (also called starter strips) are fastened along eaves and rakes. These metal strips provide the anchor point for the first and last panels in each row. High-heat ice and water shield is applied along eaves (6-12 feet up), in valleys, and around all penetrations. Synthetic underlayment rated for high temperatures is then installed over the entire deck, overlapping 6 inches minimum.
This underlayment is critical during standing seam metal roof installation because metal panels can reach 150°F+ in direct summer sun, degrading standard felt underlayment within 5-10 years. High-heat synthetic underlayment costs $0.50-1.50 per square foot but prevents premature failure.
Step 4: Install Eave and Gable Trim
Eave trim with built-in drip edge is fastened along the eaves. Two common styles exist: bullnose (rounded edge) or joggle cleat (angled). Gable/rake trim is installed along the roof sides in either 3-piece or 4-piece configurations depending on the system. These trim pieces create finished edges, manage water runoff, and provide attachment points for panels during standing seam metal roof installation. Trim is fastened directly to the deck and flashed properly to prevent water infiltration. Precision here prevents future leaks.
Step 5: Install Standing Seam Panels with Clips
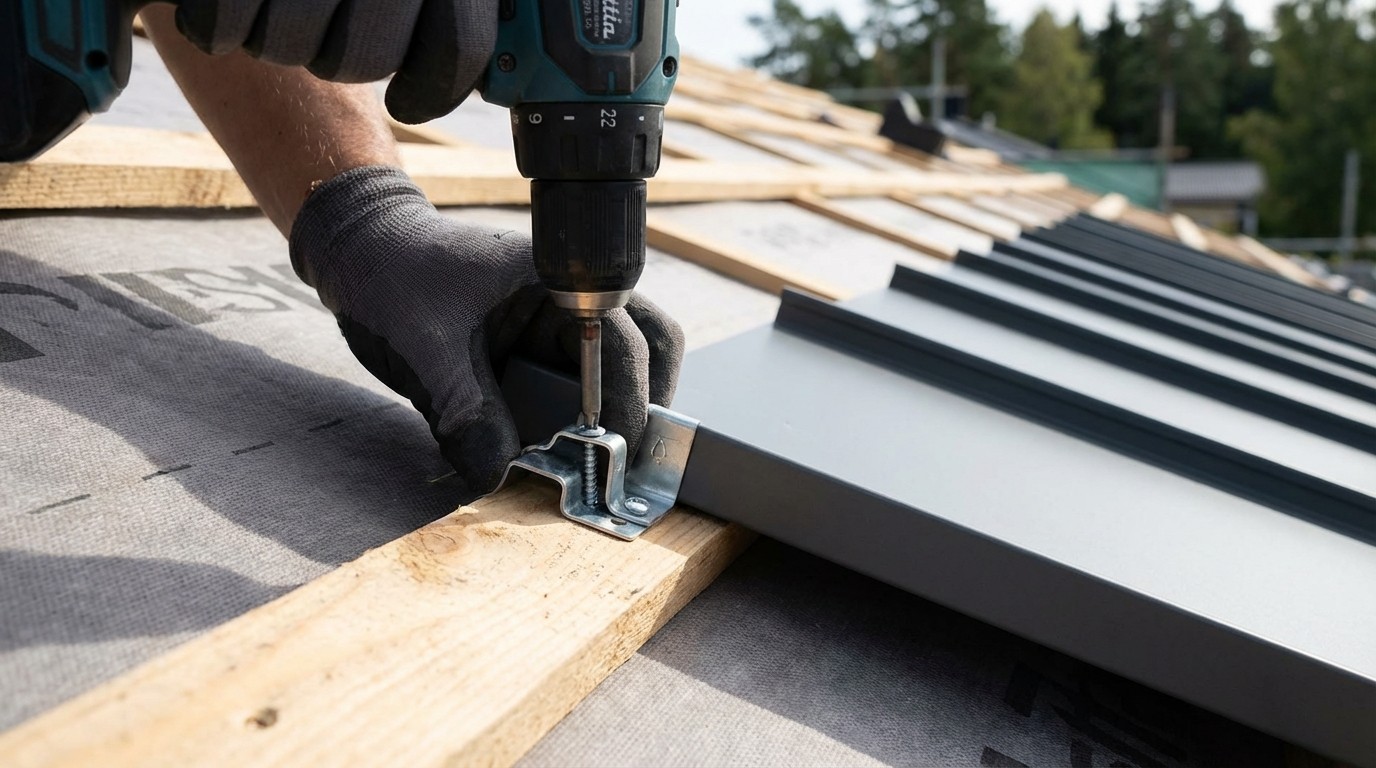
This is the most technical and time-consuming step in standing seam metal roof installation. Starting at one rake, the first panel is positioned and secured to the lock strip. Concealed fastener clips are then attached to the deck at specified intervals (typically every 12-18 inches on center per manufacturer requirements).
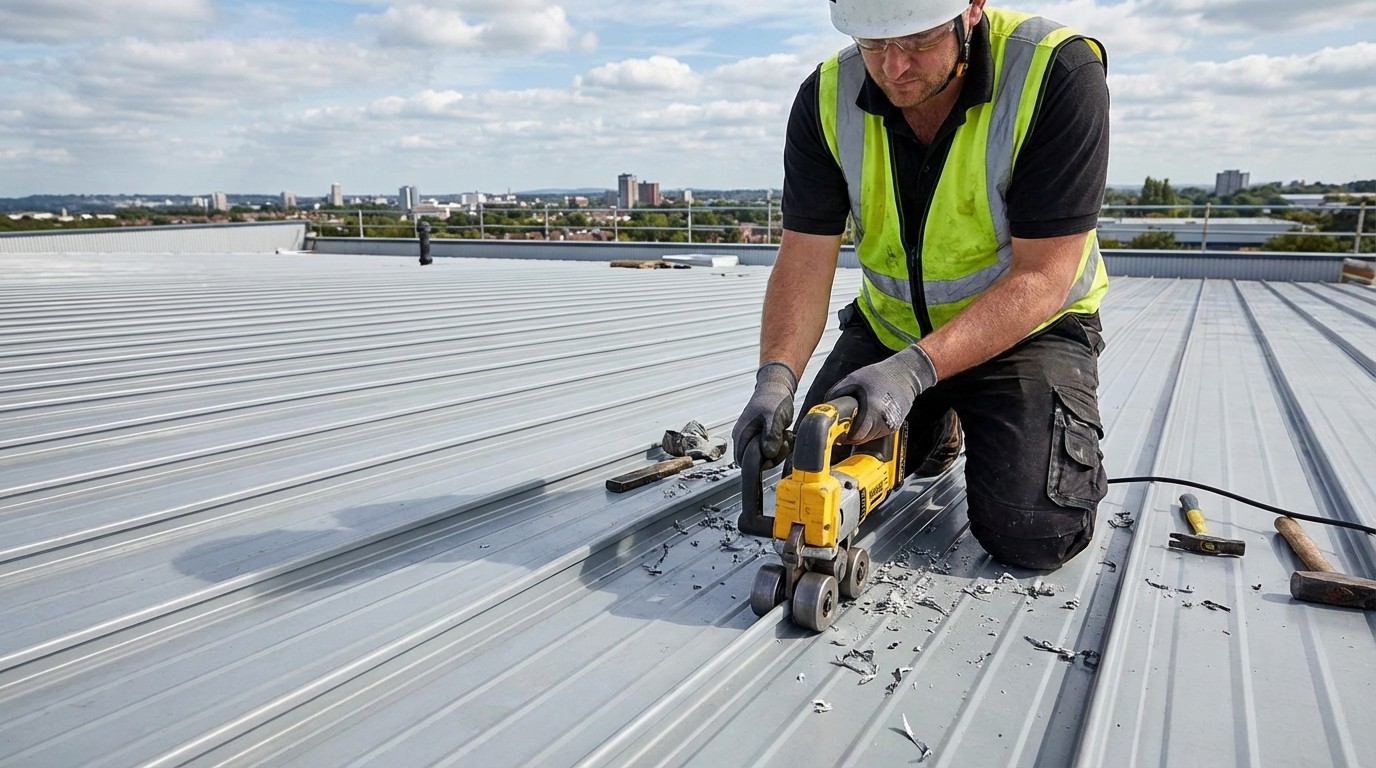
The next panel's edge slides under the raised seam of the first panel, locking over the clips. For snap-lock systems, panels literally snap onto clips. For mechanically seamed systems, a specialized seaming tool mechanically crimps the two panel edges together, creating a 180-degree fold.
This process continues across the roof. Critical: Maintaining square panel alignment and proper clip spacing. The first panel must be perfectly square to the roof, or every subsequent panel compounds the error. Clips must be spaced per specifications, too far apart allows panel flutter in wind, too close restricts thermal expansion causing buckling.
Panels expand and contract up to 3/4 inch on a 40-foot length. Sliding clips in the field allow this movement while fixed clips at ends anchor the system. Thermal expansion accommodation is what separates quality standing seam metal roof installation from amateur work that buckles within the first summer.
Step 6: Install Z-Bar and Transition Metal
Once all panels are in place, Z-bar (also called closure strip or transition metal) is installed along the ridge line during standing seam metal roof installation. The Z-bar fills the gap between the tops of opposing panels, creating a flat base for the ridge cap to attach. It also provides a ventilation pathway if using a vented ridge cap. The Z-bar is fastened along the ridge and sealed properly. Some systems use different transition methods, but Z-bar is most common on residential standing seam installations.
Step 7: Attach Ridge Cap
The final step in standing seam metal roof installation is installing the ridge cap. The cap locks into or fastens over the Z-bar, covering the ridge seam and panel tops. Vented ridge caps allow continuous ridge ventilation for improved attic airflow. Non-vented caps are used where ventilation isn't needed or is handled elsewhere.
The ridge cap creates a finished appearance and provides the final waterproofing layer at the roof peak. It's fastened per manufacturer specifications, typically with concealed clips or face-fastened screws that are hidden under overlapping sections. Proper ridge cap installation prevents wind uplift and water infiltration at this vulnerable location.
Professional standing seam metal roof installation on a typical 2,000 square foot residential roof takes 3-5 days from tear-off through final inspection. Complex roofs with multiple valleys, dormers, or steep pitches may take 5-7 days.
Standing Seam vs Exposed Fastener
Understanding the differences helps you choose the right metal roofing system for your needs and budget.
Standing Seam (Concealed Fastener)
Standing seam metal roof installation uses clips to attach panels, with no fasteners penetrating the metal. This creates clean lines and eliminates the primary failure point of exposed fastener systems. Building codes require proper fastening and flashing. Standing seam lasts 40-70 years and costs $9-16 per square foot installed as the premium option. Maintenance is virtually zero since there are no rubber washers to replace. Manufacturer warranties typically run 30-50 years. The clips allow panels to expand and contract freely, preventing thermal stress. Leak risk is lowest since no penetrations go through the weather surface. Best for residential upgrades, modern architecture, and premium applications where longevity justifies higher cost. DIY is difficult, requiring mechanical seamers and metal fabrication skills.
Exposed Fastener (Screw-Down)
Exposed fastener metal roofing uses screws with rubber washers driven through panels directly into the deck. Screw lines are visible every 12-24 inches. This system lasts 20-40 years as rubber washers degrade and require replacement. Cost is $4-9 per square foot installed, roughly half the price of standing seam. Maintenance includes inspecting and replacing failing washers every 10-15 years. Warranties typically run 20-30 years. Thermal movement is limited since screws restrict expansion, potentially causing panel distortion. Leak risk is higher from fastener penetrations. Best for barns, sheds, commercial buildings, and budget-conscious projects. DIY is more feasible with simpler installation requiring basic tools.
The cost difference is significant, standing seam costs roughly double. However, standing seam lasts twice as long with zero maintenance, making lifetime cost comparable while providing superior performance and appearance.
DIY Installation vs Professional Installation
Can you install standing seam metal roofing yourself? It's possible but significantly more challenging than asphalt shingles or exposed fastener metal roofing.
DIY Standing Seam Challenges
DIY standing seam metal roof installation is feasible for experienced builders but presents real challenges most homeowners underestimate. Special tools required include a mechanical seamer ($200-1,500 depending on hand-crank vs electric), metal brake for fabricating custom trim ($300-2,000 or rental at $50-100/day), panel shears or circular saw with metal blade, and rivet gun for trim connections.
Skills needed go beyond basic roofing. You must understand precise measuring and squaring since the first panel sets alignment for the entire roof. Knowledge of thermal expansion coefficients and proper clip placement is essential. Metal fabrication basics help with custom trim pieces. Safe work at heights handling large metal panels (16-20 feet long, sharp edges) requires caution.
Time investment is substantial. Professionals complete standing seam metal roof installation in 3-5 days. DIY typically takes 2-3 weeks for beginners working weekends, or 6-8 full days for experienced builders.
Cost savings run 40-50% on labor, saving $4-8 per square foot. For a 2,000 square foot roof, DIY costs $14,000-18,000 for materials versus $22,000-32,000 for professional installation. You save $8,000-14,000 but invest 2-3 weeks of hard physical labor.
Risks include improperly spaced clips voiding manufacturer warranty, poor panel alignment causing visible oil canning (wavy appearance), incorrect seaming technique leading to leaks at seams, and safety hazards working with large metal panels at heights. Most manufacturers require professional installation to honor warranties.
Snap-lock standing seam systems are most DIY-friendly since panels snap onto clips without mechanical seaming. However, they still require precise clip spacing and panel alignment.
When to Hire a Professional
Professional standing seam metal roof installation is recommended for most homeowners. Hire professionals if this is your first metal roof, your roof has complex shapes with multiple valleys or dormers, your pitch exceeds 6/12 slope, your project exceeds 1,500 square feet, you live in high-wind areas where proper attachment is critical, or manufacturer warranty coverage matters to you.
Professional benefits include 30-50 year manufacturer warranties that DIY installation voids, 5-10 year workmanship warranties covering installation defects, building code compliance, liability insurance coverage, faster completion (3-5 days vs 2-3 weeks), specialized tools and experience, proper panel alignment preventing oil canning, and correct clip spacing allowing thermal expansion.
Professional standing seam metal roof installation costs $9-16 per square foot installed. While expensive, you get expertise, warranties, and confidence the roof will perform for 40+ years.
Common Standing Seam Installation Mistakes
Even professional roofers sometimes make these errors during standing seam metal roof installation.
Improper Clip Spacing: Inconsistent or too-wide clip spacing causes panels to flutter in wind, creates oil canning (wavy appearance), and voids manufacturer warranties. Solution: Follow manufacturer specifications exactly, typically 12-18 inches on center. This is the most critical mistake for DIY installers.
Not Accounting for Thermal Expansion: Using all fixed clips or over-tightening fasteners prevents thermal movement. Impact: Panels buckle in summer heat or tear at fasteners. Solution: Use sliding clips in the field, fixed clips at one end only. Allows 3/4 inch expansion on 40-foot panels.
Poor Panel Alignment: If the first panel isn't square to the roof, every subsequent panel compounds the error. Solution: Square the first panel precisely using measurements to opposite eave. Check alignment every 3-4 panels using chalk lines.
Insufficient Underlayment: Skipping high-heat underlayment or using standard felt causes premature failure. Metal panels reach 150°F+ in sun, degrading standard felt within years. Solution: Use high-heat ice and water shield or synthetic underlayment rated for 250°F+.
Incorrect Seaming Pressure: Over-crimping damages panels, under-crimping creates gaps allowing water infiltration. Solution: Use mechanical seamer with consistent pressure. Test seam pull strength to verify proper connection.
Wrong Fastener Type: Using standard roofing screws instead of pancake head screws causes fasteners to back out over time. Solution: Use #10 or #12 zinc-coated pancake head screws minimum for all clip attachments during standing seam metal roof installation.
Trim Connection Gaps: Inadequate sealant at trim overlaps allows wind-driven rain to infiltrate. Solution: Apply butyl tape at all trim connections and overlaps before fastening.
Tools and Equipment Required
Optional but Helpful: Metal brake for fabricating custom trim pieces ($300-2,000 or $50-100/day rental), panel shears for faster cleaner cuts than circular saw, magnetic drill guide for accurate fastener placement, panel cart for moving materials safely on roof, and scaffolding or roof jacks for steep pitches.
Tool investment for DIY standing seam metal roof installation runs $200-500 for basic hand tools and manual seamer, or $1,500-3,000 for a complete professional-grade tool kit including power seamer and metal brake. Many specialized tools can be rented for $50-150 per day. Professional contractors provide all tools, included in labor cost.
Standing Seam Installation Cost
Understanding cost components helps you evaluate quotes and budget accurately for standing seam metal roof installation.
Material Costs
Factors increasing labor costs include complex roof shapes with multiple valleys or dormers, steep pitches over 8/12 requiring additional safety equipment, difficult access requiring scaffolding, and custom trim fabrication needs. Timeline for professional standing seam metal roof installation is 3-5 days for a typical 2,000 square foot residential roof.
For a 2,000 square foot home, total installed cost runs $18,000-32,000 for complete professional standing seam metal roof installation including materials, labor, tear-off if replacing existing roof, and proper installation of all trim and flashing components.
Additional Costs
Tear-off of existing roofing adds $1-3 per square foot ($2,000-6,000 for 2,000 SF). Decking replacement costs $2-4 per square foot if inspection reveals damage. Building permits run $200-500 depending on jurisdiction. Dumpster rental for disposal costs $300-800. New gutters if needed add $800-2,000. Total project cost for standing seam metal roof installation including all components typically runs $22,000-38,000 for a 2,000 square foot residential roof.
Learn more about metal roof costs for comparison. Use our roofing cost calculator to estimate your specific standing seam metal roof installation project based on roof size, material choice, and location.


